Inspired by some newborn photos seen elsewhere recently, Sam decided she had to have some newborn-sized knit pants to use for upcoming photo shoots.
I seem to be Snapdragon Studio Photography’s staff crafter/sewist, so I got busy with some knits she chose from my fabric stash. I really like her choices, too. There’s one more not shown here, a turquoise thermal, that’ll have to wait for another day, but these green and pink novelty knits seem just right to get started with.

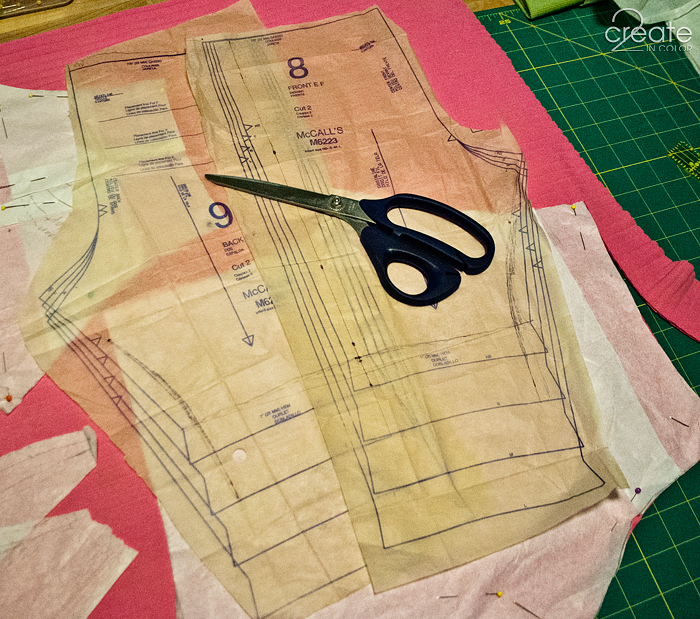
I used a commercial pattern as a reference, and began altering, adapting, modifying, customizing…

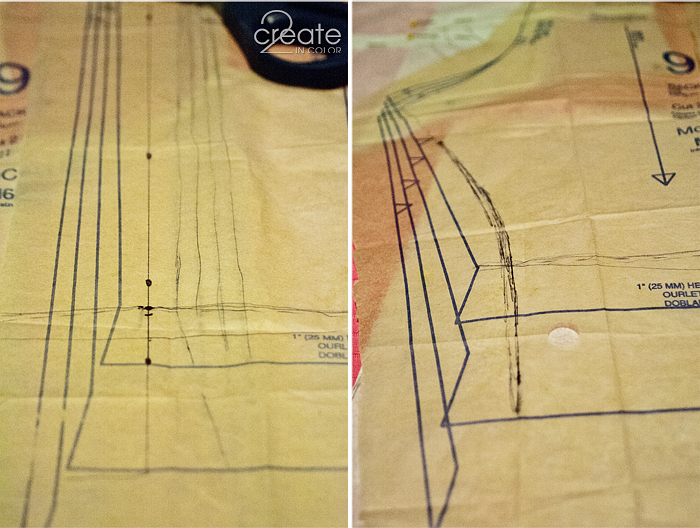
I took out the outer leg side seam by overlapping the pattern pieces to the stitching line. I decided they would be too distracting in a photo, and unnecessary for a style like this if you have enough fabric. It is my favorite way to make PJ pants, if you remember my NY Day PJ pants!
I cut the legs a couple inches longer than needed, but this way a hem can be finger pressed in place that will be just the right length. The legs of the pattern were made narrower overall, and straighter at the bottom half.
Another thing I changed was to raise the back of the waist a bit. Since the babies will be mostly curled tight on their tummies and knees, this will assure enough fabric to come up over their baby backsides.

What fits “Newborn: 8-12 lbs” at 4 weeks or 10 weeks of age will likely be a bit loose for a 7-10 day old newborn. With that in mind, I also made some XS newborn pairs while I was at it.
I took my pattern, and shrunk it and changed it in all the right places (I hope!) Now Sam will have a choice for those 5, 6, and 7 lb sweeties.

You may not know it, but sewing on knits scares me. So I gathered up my courage and plunged ahead. Jersey needle size 12 in the machine: check! Narrow zigzag for seams: check! Test seams going both directions on the fabric: check!

And then it was time to sew those seams and trim them down.

First, the center front and the center back seams, above…
Then the inner leg seam falls into place after shifting those sewn seams into their proper places!

And you know what? I had no problems at all with these knits. What a relief!

Although I stitched down a hem at the waist (only in the green ones so far) which would normally be a casing for some elastic, that’s not what is going to happen to these pants…

At photo time, these will have a big ribbon bow tied around the waist, with the bow at the back. It’s an adorable look, and I hope her mom-clients love them as much as we do! You’ll have to wait to see how that looks — no baby to try it out with, yet :)
All that remains is for me to pick up a spool of pink thread that matches the pink fabric a bit better than what I used for the inside seams. I don’t want an off-shade of thread showing on the outside of the fabric and being distracting in a gorgeous wall canvas of someone’s baby girl! You’d think that with all this thread I would have had the right one!
Here, just for your perspective on these pants — tape, sticky notes, and a 6″ ruler (less than the average hand span)… it is so easy to forget just how small a brand new baby can be!

Sam gets to pick the ribbon she will use during newborn photo shoots — the most fun job of all!
So that’s me getting creative so far this week — technical style! Now I want to play…
Gail


.jpg)