What’s better than eating fresh berries whole and just as they are? Eating fresh berries whole on top of a tasty crisp crust and some creamy filling!
I am bringing you not only a crust lesson today, but a reference list for any fruit tart you might ever make again. I think you should use this post for a reference all spring and summer! You’ll use the crust recipe for tarts forever more! Bookmark it now ;)
We’ll get to the crust in a bit, but there’s more to a berry tart than the crust. Let’s think about the other components of a fresh berry tart. I am talking about the filling, the fruit, and the garnish. Mmmmmmm! This might seem long — feel free to skim until you get to the crust lesson. I hope you come back to these lists for ideas, though…

For a fresh berry tart, you need berries of course, but don’t limit yourself! To make your tart especially eye-catching, which always makes people think it tastes even better (HINT!) you can add some contrasting colored fruits such as kiwi, pineapple, apricot; whatever is at its best. Since the fruit is the focus, always make sure to use the ripest, prettiest, and most flavorful choices you can.
Choose your fruit options:
- one type of fresh berry
- mixed fresh berries
- add other readily available canned fruit (pineapple, mandarin orange, maraschino cherries)
- add other fresh fruits (apricots, peaches, kiwi, banana, fresh pineapple, mango…)
- add a cooked berry component (especially for blueberries and raspberries, along the lines of this pie filling)
- use a clear glaze over the fruit (from a pkg or jelly or arrowroot) for appearance and freshness
There are so many filling options! But the main consideration is: how does each one work with the fruit you have chosen? Then decide: Do you want a strong vanilla flavor? A chocolate accent? Something fluffy? Tangy, sweet, or both? Does it need to hold up for a day or two? Is adding another fruit flavor a good idea? Remember, these fillings should end up only 1/4″ to 1″ deep.
Choose a filling:
- the classic pastry cream (vanilla, either thick and rich, or lightened with whipped cream)
- my standard: a 2-ingredient white chocolate mousse
- whipped cream (sweetened, with or without vanilla)
- Whipped cream with fruit puree mixed in (known as a “fool”)
- a sweetened and flavored (lemon, vanilla) mascarpone filling
- cheesecake filling (pkg/scratch, no-bake or [baked, cooled, then whipped])
- sour cream based fruit dip (flavored with citrus zest or not)
- layer of chocolate ganache (dark, milk, or white)
- lemon curd (great with blueberries) or other fruit curds (you can lighten these by folding in whipped cream if you want)
- an under layer of a high-quality and strong-flavored jam
- coconut pie filling :) especially if you toast the coconut first YUM
- boxed pudding or mousse mix (vanilla, French vanilla, flavors) can keep it less overwhelming ;)
- Layer a fluffy filling over a dense filling — whipped cream over dark chocolate ganache?

Now for your tart’s jewelry and accessories :) Garnishes shouldn’t repeat or compete with what you’ve used as a filling, but should add to the beauty and flavor/texture combinations of the whole tart. For example, if you use a whipped cream-based filling, don’t serve whipped cream on top. Remember, a naked tart is always an option, especially if your fruit is perfect!
Choose a garnish or sauce for serving:
- mint sprig
- powdered sugar sprinkle
- dollop of whipped cream
- dollop of lime & sour cream fruit dip
- raspberry sauce (or other flavor coulis)
- vanilla custard drizzle (aka creme anglaise)
- chocolate (sauce, ganache, or melted) drizzle (dark, milk, or white)
- honey drizzle, flavored honey (vanilla, cinnamon, lavender)
- toasted or untoasted coconut
- sliced almonds, chopped pistachios, other nuts
- piped chocolate shape (leaf, heart, squiggles)
And now choose the crust! Today I will show you an easy but wonderful tart crust recipe, rich with butter, tender, and chewy-crisp. You will be able to count on it over and over. But there are other options:
- Any Pate Sucree (sweet paste dough) and there are many variations!
- crust with ground nuts included or used as the flour
- cookie crumb or graham cracker crumb crust
- regular old pie crust!
- frozen puff pastry or filo dough, prepared as directed on the package
- a Dutch Baby (this is really fun at brunch)
- almost any other butter crust
So what are we going to bake this gorgeous fresh berry tart in? Tart pans are perfect for the more tender pate sucree crusts, and for being able to serve the tart standing, panless, on a plate. You can also use anything you bake pies in, and then of course there are a kajillion choices of individual tart pans.
BUT! I will show you one of my secrets! How to use a cake pan and fake it, although the top edge won’t look quite as neat. BTW, you can fake a springform pan with this method, also! (I made a heart-shaped cheesecake once with my heart-shaped cake pan)


Three steps to a faux-tart-pan:
1) Here’s my 10″ cake pan. I tore off a long sheet of foil, tore it into two long strips, folded them 3-4 times and formed them to the bottom of my pan. These will be the lifters, allowing us to take the shallow tart shell out of the deep pan. Notice they’re not at 90 degree angles to each other; this makes them easier for one person to manage.
2) Next, I took a 10″ cake circle — you can use any clean cardboard, it is not going to touch your food — and trimmed it down just a bit so it fits inside the pan with little or no gap. You have to be able to get it out, so make sure there are no tight spots.
3) Last, line the pan with foil, fitting it into the corners without putting your fingertips through it :/ making it as smooth as you can. Wider, heavy-duty foil is a good choice, but I was too lazy to walk the 5 steps to grab mine! Crimp everything over the edges to hold it in place.
If you don’t own a loose-bottom tart pan, did you just add one to your shopping list or birthday list? ;)
And now, without further ado (there’s a LOT of ado above here, isn’t there? yikes!) ……. The CRUST!
Recipe for Tart Crust
adapted from “In the Sweet Kitchen” by Regan Daley
You’ll want to start this crust early enough to chill the dough thoroughly before baking, for 1 hour up to a month! This makes a very buttery chewy-sugar-cookie type of crust. Delicious!
1 1/4 cup flour — if you have cake flour, use it for the 1/4 cup
1/2 to 2/3 cup powdered (10X) sugar (aka confectioner’s sugar) sifted AFTER measuring if it has lumps
1/4 tsp salt … or not, your choice, and also depending on how salty your butter might be
1 cube butter (4 oz) very cold, cut into 8 pieces
2 egg yolks from large or extra-large eggs
1 Tbsp cream or half-and-half, although you may not need it all

You can use a food processor or make this by hand; refer to my Pie Crust Basics post for both methods! Combine the dry ingredients: flour, powdered sugar, salt. Cut in the butter until the butter pieces are the size of peas, lentils, rice, and oatmeal flakes (examples shown below.)

Drizzle egg yolks over, then stir them in or process for 3 seconds. Add cream by one teaspoon increments only if needed: you are looking for a dough that is all crumbles, but feels moist and will make clumps when you pinch it. It should be *barely* but definitely moist! You can see the difference in the two side-by-side pictures below.
Note: if you used a food processor, fluff up the crumbles with a fork so you can check the bottom layers — the top layer always seems drier.

Dump the crumbles of dough into your tart pan, but hold back about 2-3 Tbsp — we’ll want them later. With floured fingertips, distribute the dough crumbles fairly evenly around the pan. Drape plastic wrap over the whole pan, and then press the dough into a cohesive crust working from the center, outward. I just put a cheap sandwich baggie over my hand and go for it!
If you are using a real tart pan with a removable bottom, press the dough right up to the top edge, using up the reserved crumbles as needed to fill in thin spots. If you are using a faux-tart-pan, you want to have enough dough at the edges to cover about 1″ of the pan sides; they need to be sturdy and tall enough to hold in some filling! We’ll fiddle with getting it just right in a minute. Smooth the bottom free from finger dents. Place tart pan on a cookie sheet or pizza pan for support.

Now to fix the edges of our faux-tart-pan’s crust! Hang in here with me, and just do this one sentence at a time! :) Skip this if you’re using a tart pan.
1) Using the dough crumbles you held back, press bits into areas of the crust sides where it needs to be taller (picture above, top right) You want it to be evenly thick all the way around (about 1/4″, 5mm) and close to the same height — about 3/4″ to 1″ tall. So fill in the sides and make sure the corner all the way around is thick enough to be sturdy. 2) Next, find a spot where the crust seems to be the right height — you know, as if you were using a real tart pan! Grab the edge of the pan with your fingers inside. Rest your fingertips on the top edge of the dough where it is just right. 3) Now take a moment to get the feel of it: your hand position, the pan, the height of the dough… OK, start turning the pan — when you get to a high spot, push it down — when you get to a low spot, add another pinch of extra dough. Go around a couple times until it feels even. Then, smooth down any ridges that formed when you pushed down the high spots (see last two pics, above) Ta-DAAA!
Finally some simple stuff: Cover your crust-lined pan with plastic wrap and put the whole thing in the freezer for an hour or more, or the refrigerator 6+ hours or overnight. This is very important!

When it’s well-chilled, take it out, poke it all over the bottom with a fork, follow directions for baking an empty crust here (briefly: crumple a sheet of parchment larger than the crust, line the crust with the parchment, fill it with pie weights or dried beans out to the edge.) You can see below, I tried something (getting creative!) — I snuggled a slightly smaller cake pan with the bean weights in it on top of the parchment. It worked fine :)

Bake it at 375F for 15 minutes; remove beans with parchment — everything’s going to be really buttery at this point! — continue baking for about 10 – 15 minutes until golden brown at the edges and almost set in the center. This is a cookie-style crust, and just like a cookie it will get firmer and crisper as it cools — be careful not to overbake! Watch carefully the last few minutes.
And by the way, mine isn’t as dark as it looks in the pictures, but it sure could have come out a minute or two earlier! (Bonus — the edges taste like browned-butter cookies!) Here I am with the empty tart shell. Smells heavenly!

After it cools completely, take away the cardboard cake circle, peel the foil off the sides. Then using a frosting spreader or other long, thin something-or-another, slide it between the foil and crust, carefully moving all the way around until crust is loose from the foil. Slide it onto your serving plate.
Here I am making my 2-ingredient white chocolate mousse. Please use real white chocolate! Vanilla chips won’t work. Baker’s brand is the only domestic and readily available white chocolate as far as I know; look for it in the grocery store’s baking section. (not affiliated, just a fan!) There are others available — find some! I see Ghiradelli bulk chunks now and then. This recipe takes about 10 minutes of work, with two periods of waiting in between. (4 oz white chocolate; 8 oz cream. I only used 4 of those squares)

If you use the microwave to melt the chocolate and cream, start with 15 seconds and then stir for at least 30 seconds. MW 5 second intervals and stir in between. Don’t put it back in the microwave unless the chocolate won’t melt with continued stirring. White chocolate is pretty touchy about the microwave.
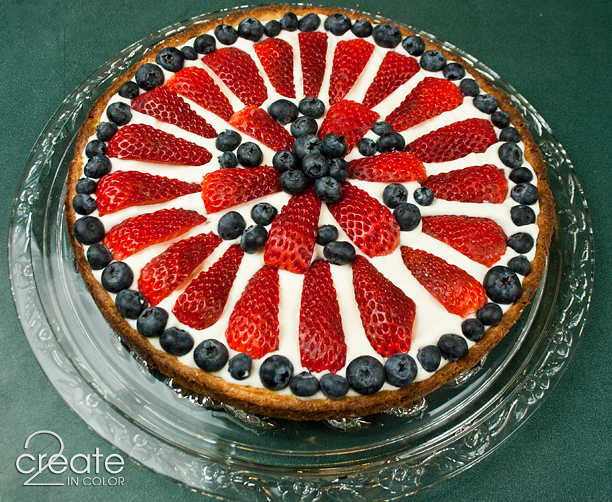
Here I am with the white chocolate mousse-filled tart shell. Can’t wait for a slice! (Actually, I didn’t wait long as you will see at the end of the post; the mousse didn’t have time to set up! It becomes more solid once refrigerated, kind of the consistency of frosting.)

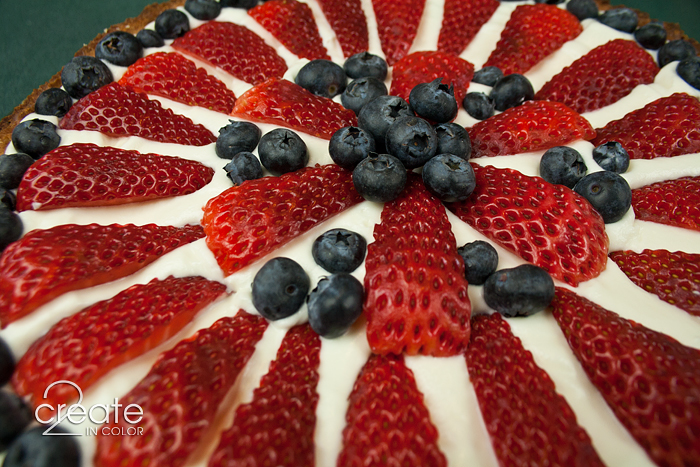
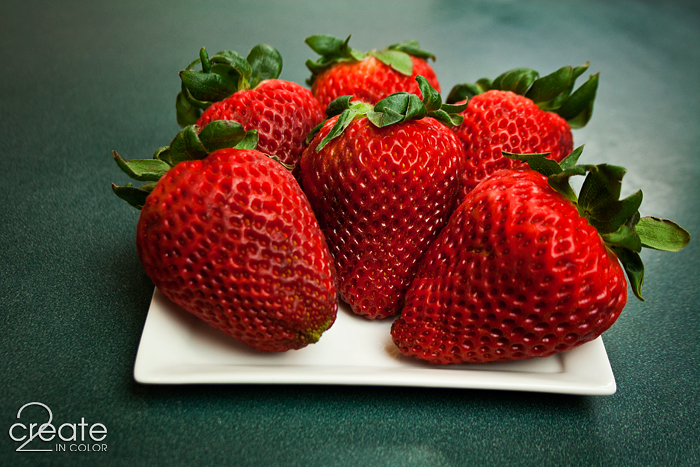
Here I am playing with strawberries — my mom showed up on my doorstep with these on Wednesday! Nice surprise! They’re pretty gigantic, though, and needed to be cut up. Arrange them how you want, but make it pretty!


Here I am putting on my garnish… using more fruit! That could be called a blueberry necklace? We love fresh fruit!

Here I am, eating it! Yum!!! It was also great with my free House Blend Starbucks on Friday morning :)


Just for fun, go to epicurious.com, click on Recipes and Menus tab, scroll down to the search box and type in “fresh strawberry tart” You’ll get 88 drool-worthy hits of inspiration, not all strawberry, either.
Enjoy your berries — make a tart with them! And don’t forget those lists of options for fruit tarts at the beginning of the post!
Gail


.jpg)