


![]()
Button, button, who’s got the button? I do!
I received some colorful buttons in the mail from an internet friend who purchased some jars of buttons — with button game instructions included — just for the jars. She knew I would put them to good use someday, and that day was much sooner than I ever expected.
It’s not that I don’t have 10 times that many loose buttons of my own, but you know… maybe there were some cooler ones in hers! And there were. But I didn’t use them in this project. I’m saving them for something EXTRA-special. We all know what that means.
Having these new buttons sitting on my work table where I could admire them and stir them and have buttony thoughts brought on today’s project. Suddenly I couldn’t wait to cover one of my paper mache letters with buttons!
![]()
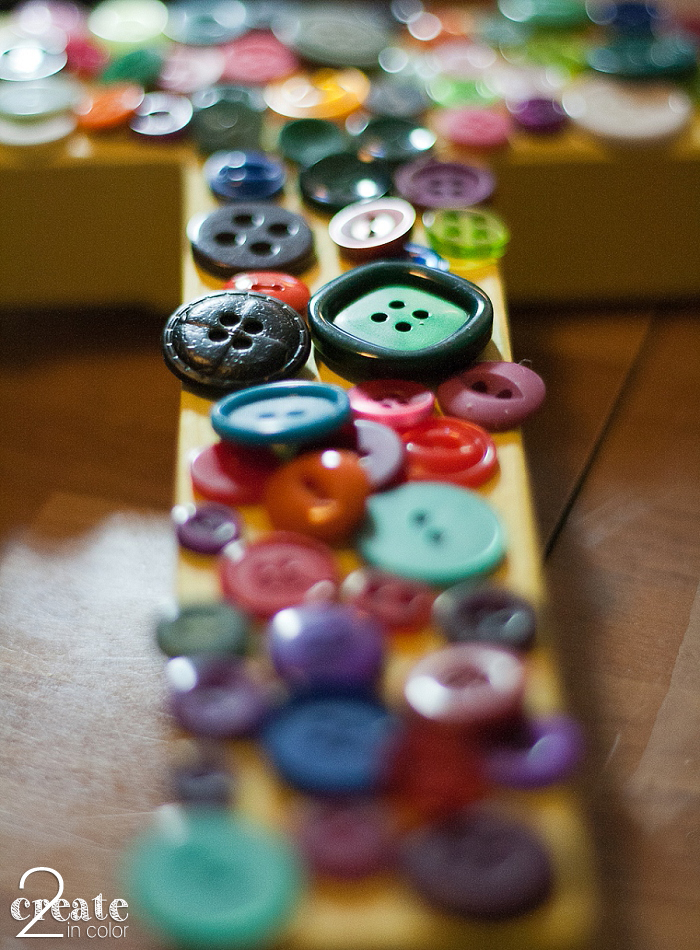
I have three words worth of paper mache letters awaiting my attentions: Imagine, Create, and Fun. In honor of my button provider Tori, I chose the letter T :) Seemed like the right thing to do!
Painting the letter a sunny yellow, just a shade more intense than my creative studio’s walls, was my first step. Sorting through buttons and having some more fun was next …
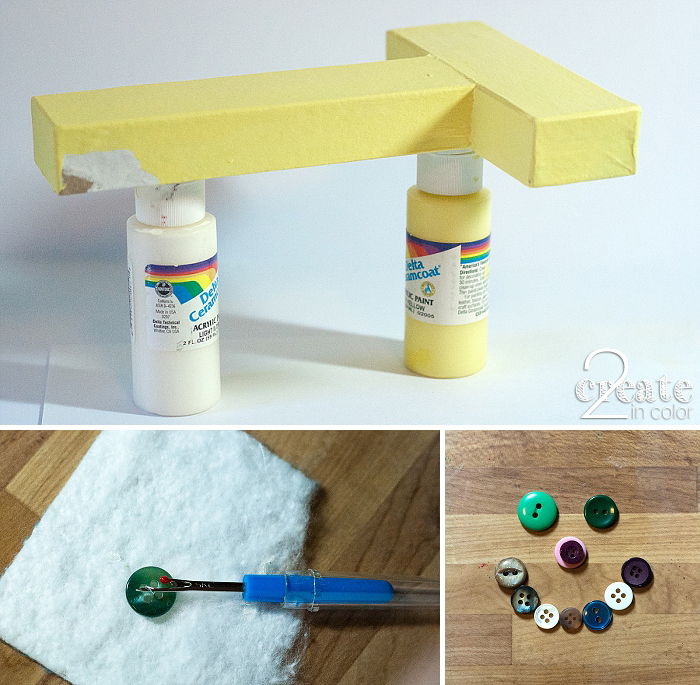
![]() Remove any thread or staples from the button holes, too!
Remove any thread or staples from the button holes, too!
Check to see if you have enough of the right buttons to do what you want to do…
![]()
After painting up the bare spots on the paper mache from where I held onto it when I covered it in yellow, I began figuring out how to place the buttons for max coverage…
- Place the big green button evenly over the surface. You can start with your own favorite color ;)
- Place the other colored big buttons evenly amongst the green ones.
- Begin filling with smaller and smaller buttons, shifting the big ones slightly as needed.
- Add tiny buttons, rearranging the small- and medium-sized ones to accommodate the arrangement needed to actually fill in the major gaps.
- Make sure all buttons are laying flat!
- Resist the urge to spend four days mosaic-ing the buttons to cover every square millimeter of space.
![]()
A pointy seam ripper, bamboo skewer, or large tapestry needle will make maneuvering buttons much easier than just using your fingers.
This takes WAY more time and effort than you might think. Just sayin’
Reserve some extra buttons for adding or swapping as needed. Once you are happy with your arrangement of coverage, color, and sizes, begin gluing down the buttons.
WAIT!
Once you THINK you are happy with your arrangement of coverage, color, and sizes, take some digital pictures to refer to, just in case you bump your letter! This luckily did not happen to me, but I had that little daytime-nightmare about it! I snapped these just before starting to glue…
![]()
Now, I started by gluing the large buttons, thinking my arrangement wouldn’t need any adjusting. Do not let yourself be deceived by your own apparent cleverness — this is not the way to go. Start at one end and move toward the middle partway. Start at another place and work partway toward the middle, and repeat.
I ended up rearranging the central top of the T, even swapping out a couple of buttons from the top area of the T’s stem for a better fit. These adjustments become apparent only as you get those slippery little circles permanently attached!
![]()
Work your way methodically through the area, gluing generously but not sloppily. I used Aleen’s Quick Dry Tacky Glue, dabbing just enough on the back of the button to let it float around but not to squish glue up through the holes. By the end of my gluing, I found I needed not only the extra buttons I had set aside for fillers, but even more for swap-outs to make the spacing work better. So, make sure you have a handful of both colorful and neutral extras.
![]()
T is for Ta-Daaaaah!
I am happy to say that every single one of these buttons on the letter T is from the assortment that Ms. Tori sent me from her Nantucket purchase. That makes me very happy!
So does this little sweetie:
![]()
I may give some attention to the edges of my T, shading them in some way for more definition. I may actually get button crazy and add buttons to the sides of my T as well! But as you might have noticed, I was SO excited to show you my button-covered T I didn’t even wait for the glue to dry.
![]()
The pumpkin cheesecake bars will wait for another day ;)
Happy gluing!
Gail


.jpg)
Tori - T is for ta-daaa all right! How cute that is… I knew you’d make good use of those buttons :) And I was wondering when I first saw this if you chose the letter T for me, because that’s exactly the kind of thing I’d do :)11.12.2014 – 6:09pm
Libby Wiers - Love this! I’ll have to chew on this a bit and maybe I’ll use up some buttons on a piece for the wall of my new room.02.17.2015 – 2:25pm