

![]()
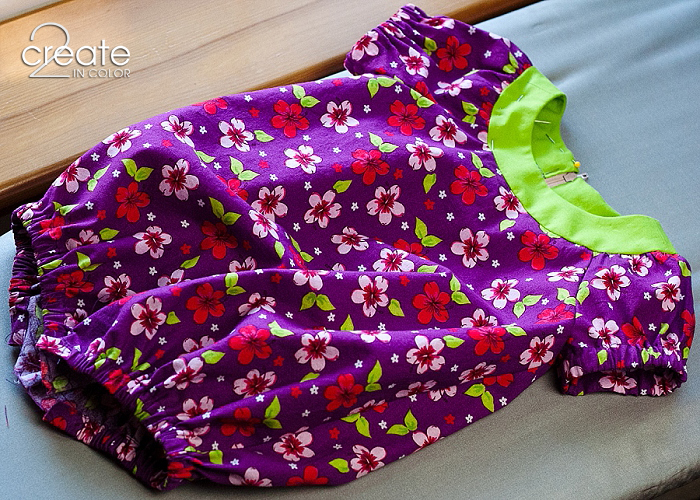
It’s almost done… I need to make sure the elastic in the legs is just right, but I need a baby for that! This may be the beginning of a sewing spree! I do LOVE to stitch up little clothes :)
There was something that caught my attention about this pattern, McCalls 6726 and I had to make it at least once for my blog-partner/daughter/Sam’s cutie-pie daughter Abbi. I wanted to make the pattern without the applique options, just for sizing purposes this time.
I got the urge to start late one night so I went “shopping” in my fabric stash. The floral fabric was there and had been washed, so even though I didn’t get much done besides choosing fabric that night, I stayed with that choice. But! But then, I realized that I didn’t have quite the right fabric for an accent color, so I did have to go shopping. *big grin*
![]()
This stage of a sewing project just makes me so happy and excited in a quiet calm sort of way. It’s all about the perfection that could result. Perfection in the piece, perfection in the experience — the potential for fun and creativity and making something out of raw materials! Not thoughts of seam rippers, balky sewing machines, interfacing fused to the soleplate of the iron. [After report: none of that happened!] With the sunshine streaming in the windows the next morning, I got started.
![]()
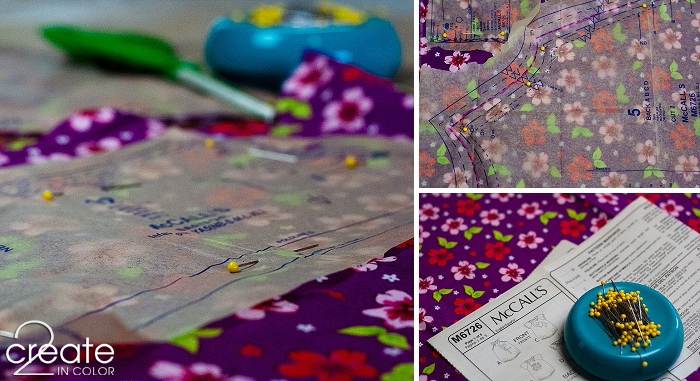
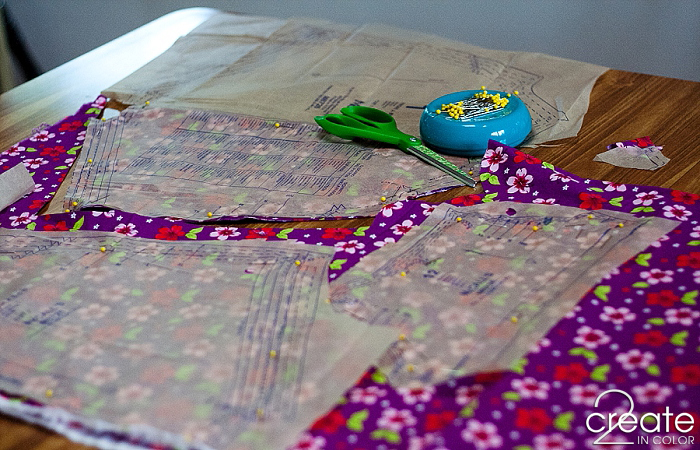
Pattern tissue, my favorite pins on my favorite pincushion and my favorite scissors… The scissors are “favorite” for their looks, not their function — I have Ginghers that cut far better, but these are green with holly leaves :)
Note: I was practicing with my camera while sewing, so there are far more pictures than needed. I took a lot of process photos, so you can also pick up some of my favorite sewing tips, techniques, demos, and pet sewing steps below. Enjoy, as I hope Abbi (and Sam) will enjoy the romper…
On multi-size patterns — most are, these days — it can help to highlight the cutting line you need to use.

![]()
On my shopping trip, I was excited to find a perfect matching lime green Kona Cotton to use for the neck trim. It will be softer and smoother than a less expensive fabric, too. And then I also found this really cute fabric with… never mind! You’ll see it later on this summer! Do you continually SEE why we have the words “in color” in our blog name!? We just can’t help ourselves. Especially me.
![]()
Neckline bands with sew-in interfacing. I am on a fusible interfacing strike. It may not last long.
Tip: trim and clip the seam a lot, then press everything toward the facing. You will never see the stitched seam on the outside of the piece. Upper left photo is the inside; lower right view is the outside. Seam shows; seam doesn’t show!
![]()
Eventually I’ll make another one of these rompers with elephant applique — approved by Sam and one of the two I was leaning towards anyway. Actually, she approved the two options I was favoring before she knew what they were. The second is the flower-petal neckline. I am thinking smaller petals though? Maybe. In any case, the elephant will be next! This one, I’m just letting the fabrics run the show.
Tip: your project does not have to be lofty and expensive to use French seams. With only a tiny bit of practice, you’ll get so good at them that they only take a couple extra minutes. Then there are no ravely edges to catch baby toes and fingers! I like to press the first seam (1/4″ and done the “wrong” way) open flat. Everything behaves so nicely after that…
![]()
When you need a streamlined seam — bulk matters under baby arms — stitch, zigzag, trim close.
![]()
I revert to using just one tool to turn up hems sometimes: my sewing machine. I turned up the 1/4″ edge and the 7/8″ total hem allowance by stitching along those measurements then folding and pinning. If you look carefully below-left, you will spot the 1/4″ line.
Long stitches and loose tension make these stitches easy to remove — it’s called Basting.
![]()
When a pattern says stitch close to the edge of the folded up hem, they mean it. Elastic needs to fit inside these “hems.” You also must leave a gap in the stitching to close up after the elastic is inside.
![]()
It’s easier to sew the sleeves in before ^^ putting the elastic in, though; the elastic makes them 3-D and awkward. Here you go…
Pin where you will need to stitch and with the heads of the pins facing this way. You’ll never be caught with them facing the wrong way or hiding underneath (where you will sew over them by accident, the fabric will tear, your machine needle will break and you will lose your eye. Just sayin’)
![]()
Curved seams are often double stitched with a straight stitch then trimmed. They tend not to fray so don’t need the zigzag.
So, the photo below? ACK! Right? Nope. These two curved neckline pieces of fabric actually fit together perfectly: AT the line where you will stitch. The edges of the fabric pieces are NOT the same length though!
![]()
When you need to sew two different curves together, remember that they only match at the stitching line, not at the cut edge. If your pattern says “Stay Stitch” and “Clip Curves as needed” pay attention. It solves everything...
![]()
A bigger view of that exact area, showing the Stay Stitching (to keep from clipping to far and especially to prevent stretching) and clipping. Pinned at the exact seam line, it’s a beautiful match!
![]()
Pin as much as you like — LOTS for me, why not? Sewing curves for a great result can be tricky!
Remove each pin or two as you come to it. Slow, yes. Safe and accurate? Yes.
![]()
The top of the sleeve is actually part of the neckline in this pattern. Those areas needed to be gathered. I prefer to put my basting lines for gathering 1/8″ on either side of where I will be stitching. For a 5/8″ seam, I baste at 4/8″ and 6/8″…
![]()
![]()
This is how I sew elastic together. Narrow elastic is stitched with the 3-step zigzag, as above. For wider elastic, I straight-stitch big W-shapes to simulate the same effect. It stretches and never breaks!
The leg elastic (below) is sewn down at each end, and then another fabric piece gets sewn across the front and back each, for the snaps. I can’t finish this part until the Abbi-gator lends me her cute little chubby legs for a try-on! I may need to make the elastic shorter or longer so it fits right.
For this pattern to go together properly and not tear apart or pucker later, the instructions said to do the stitching and clipping shown below left. You MUST do this when told or things just will NOT fit together. And that’s frustrating, isn’t it? Instructions for sewing patterns can hold critical info — be sure to review them and make sure you don’t miss something like this.
![]()
You’ve seen hints of the neckline and zipper in the background already! I worked on them between these other steps. I used a 20-some-year-old zipper that is the EXACT shade of the pinkish flowers. I’ve done the neckline facing a bit differently to keep that area from being too bulky. Bulky baby clothes are a no-no in my book. It’s not couture sewing, but whatever!
I edge-finished the facing edge with a decorative stitch, then hand sewed it down. Then I trimmed off the extra fabric that normally would have been tucked up inside the green neckband.
![]()
I am now officially a grandma who sews clothes for her granddaughter. Please don’t ever let me become that cliche who makes archaic, elaborate, impractical items that hang unappreciated in the back of the closet until grandma comes to visit! Whup me upside the head and get me back on track if I stray!
Happy sewing!
Gail


.jpg)