

![]()
What’s up with your ironing space? Do you iron a lot? Are you one of those people that never irons? Do you find it frustrating? Do you leave your ironing board set up all the time or put it away? (Do you even have an ironing board?) Either way, I’ve got some tips and advice for you today! Irons are a big deal to THIS fabric girl!
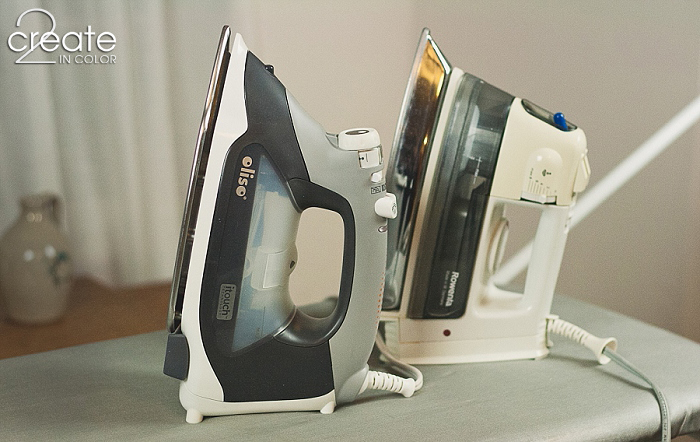
And I’m so excited today! I got my new iron yesterday! A few years ago, my favorite steam generator iron bit the dust. I replaced it, but the new ones are Not.Worth.It. (grrrr…) So I broke out my regular iron from iron jail: it pees water like an over-excited puppy when you first tip it to iron! It’s returning to back-up status immediately.
My new iron is an Oliso Smart Iron. The main fantastic unique amazing feature it has, is that you don’t have to pick it up. You read that right — it extends legs to lift itself off the fabric when you let go of the handle! The feature can easily be turned off, but this iron is heavy, and filled with water even heavier. That means it will do a good job pressing and ironing without having to bear down on it, but it also makes it heavier to stand up each time. The super-de-duper feature is one I am going to love!
My new iron is the shining star of my ironing station now. I also have a collection of tools that live at my ironing board that make my life easier.
You met my ironing board here when I made it a new cover. I love my homemade ironing board covers that fit perfectly! After 20 years I still don’t like the pivoting hanging rack permanently attached to the end of my board, but hey, otherwise it is a nice sturdy board! You’ll see a lot of it in the pictures today.
What do you need at your ironing station to make YOUR style of ironing a breeze? That’s what this post is all about! So first, find your ironing “style” and then see what I suggest for your Just Right For You ironing station! First we have…
![]()
The Casual Ironer
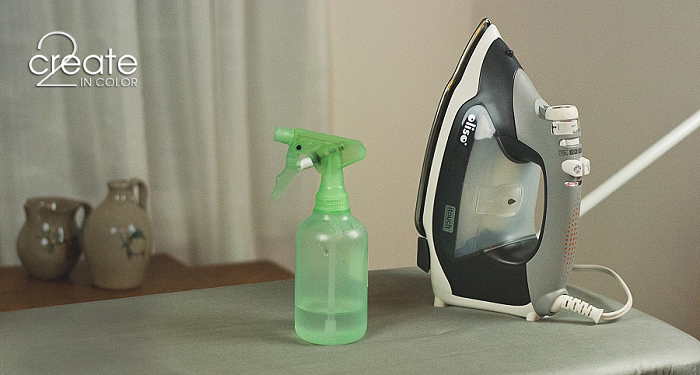
If you only occasionally iron some clothes, you won’t need much. You can get away with a spray bottle of water that puts out a fine mist — no drips! A decent iron that heats to reliable temperatures and doesn’t spit water is a must for anyone. You don’t even need an ironing board — you can use a folded bath or beach towel on a heat-resistant surface (kitchen or bathroom counter) or an ironing mat which you can purchase.
Next up…
![]()
The Daily to Weekly Clothing Ironer
You can do with a few more things at your ironing station. If you’re going to iron your clothing regularly, keep your wardrobe looking sharp other ways, too! Consider a place to leave your ironing board up permanently, safe from tipping or the iron getting pulled off by the cord from kids, pets, or other random events :)
Here’s what I suggest for you.
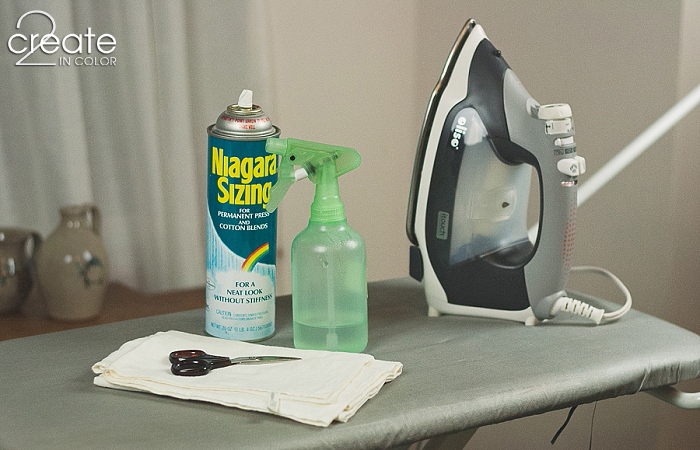
- The spray bottle mentioned above, plus
- A pressing cloth such as an ordinary flour sack towel. The pressing cloth may not get used much, but it can be very handy for a synthetic item that’s really wrinkly. When you need to get in there and IRON it, a pressing cloth can keep you from getting iron imprints, ridges, and shiny spots!
- Some spray sizing. I recently found my very old can of Niagara brand sizing and am almost done using it up. There are lots of options out there, but you can usually find this in the laundry aisle at the grocery store. Sizing is different from starch, so don’t hesitate! It adds a small amount of crispness, but the main wonderful thing it does is make ironing smooth, fast, and effective! Your iron glides and the wrinkles just melt away! My next sizing will be Mary Ellen brand, unscented.
- A pair of small scissors for snipping those stray threads on your garment.
Maybe you don’t really iron clothes much. Maybe you are…
The Crafty Ironer
You, you crafty ironer you, only break out the iron when you craft with fabrics and fibers. You’ll find this list to be perfect! First, make sure you have the spray bottle and snips listed above, and maybe the sizing if it sounds good to you.
- Pins and a pin cushion of some sort — I love my magnetic one; sometimes I just use the end of my padded ironing board itself. Usually I have my many-pockets ironing board organizer in use, with its own soft pincushion included (below)
- Pencil. You’ll be surprised how often a little pencil mark or line makes the difference! It doesn’t hurt your fabric, become permanent with ironing, or look obnoxious. What doesn’t rub out or disappear on its own usually looks like a shadow near a stitching line.
- Bamboo skewer. Yeah, really. Cheap, heat-proof, and able to push or hold pieces in place while you have the iron right there, too close for your fingers!
- Wastebasket. Don’t let scraps pile up on the end of the board, or get all over the floor. I need to follow my own advice here ;)
- Teflon pressing sheet. If you are using fusibles, you know how often that stuff gets on your ironing board cover! A non-stick pressing sheet — it doesn’t have to actually be Teflon — will keep things gunk-free! You can use baking parchment instead; I often have the pressing sheet below, and use parchment between my fabric and iron when I am fusing stuff. You know why? Because I hate cleaning off my iron or getting re-melted fusible on my good shirts!
If you sew, you should be really really into this whole ironing thing! Here you go…
You can see how my small items are kept quite handy with my ironing organizer. I have had it for years, it is June Tailor brand; not sure if they still make them. My spray bottle hangs on that pivoting hanging rack — at least it has one good use! The pockets will contains all things a sewist needs…
The Apparel Sewist, or Home Decor Sewist, Ironer
Here’s what you need to have right at your ironing board! Buy yourself doubles and leave one to permanently inhabit your ironing station. All the things listed above, plus:
- Trimming scissors. I like to leave my 6″ shears at the ironing board for trimming seam allowances, etc. You need something beefier than snips for this!
- Hem Gauge with its heat-proof nylon slider. I have these everywhere. I use them in every place!
- Tape measure. Yes, one just for the ironing station. I believe ALL tape measures should be numbered from opposite ends on the opposite side — meaning one end has “1” on one side, and “59” on the other side. So convenient!
- A sheer pressing cloth. I love mine for making sure I am actually pressing the small parts I need to when I need a pressing cloth. This is my second one, brand new and fresh out of the package. When my last one went missing, I replaced it! (at the 50% off the Notions Wall sale, of course!)
- Hem pressing strips. I make these handy strips from manilla file folders — they can take the heat and steam without disintegrating and make pressing up small hems (under a couple inches) so speedy! Mark their width with a permanent marker. You tuck them inside the hem you want to fold up, and then slide the fabric until the edge and the fold are snug up against the exact width of the pressing strip. (not pictured)
- Safety pins. They’ll end up coming in handy now and then!
- A couple hand-sewing needles, threaded (or keep a spool of thread at hand) for random basting needs. Spontaneous basting is known to happen at my ironing station!

![]()
The Serious Sewist is by definition a…
Serious Ironer and a Serious Presser
You are invested in ironing and pressing! You probably have more than one ironing surface set up, and can’t remember the last time you broke down your ironing board to put away. Remember trying to find an “away” to put it? I do!
I am not addressing the quilter’s ironing station today because they keep it simple. A couple tweaks to the Crafty Ironer list is all that’s needed. But for other sewists, again, all the things above plus:
- A sleeve board. For those pointy corners and skinny areas. It’s not called a sleeve board for nothing ;) Also, its elevated design and sharper edges let you press darts and seams without needing the next couple items (just not as nicely.)
- A tailor’s ham. Betcha can’t figure out how it got that name LOL. All the different curves on a ham make t easy to press darts and curved seams without pressing wrinkles into the surrounding fabric. The two different fabrics it is made from provide two different ironing experiences — the wool side is much grippier than the cotton drill side. Three-dimensional pressing problems need 3-D pressing answers!
- A seam roll. This serves the same purpose as a tailor’s ham, but is used for straight seams where you want to press the stitching line but NOT the edges of the seam allowance (because sometimes it leaves marks or bumps in the garment fabric.) It is MUCH easier to use this little gem than it is to hold your iron so just the iron’s nose touches the seam line! Oh, my aching shoulder! You don’t need one of these if that sounds ridiculous ;)
![]()
Things I don’t have, or don’t use, that you might actually need: a needle board, used for pressing very nappy fabrics such as velvet without smashing them flat. Other pressing cloth varieties — there are grippy ones, larger ones, sheerer ones. A corner turner, which is a small plastic device with a sharp pointy corner that can help you turn a pointy corner right side out nicely. A pressing mitt, for when you want to use your (protected) hand as the ironing surface… I actually might want one of these.
Things you might like to keep at your ironing station that I don’t: seam ripper. I do mine sitting at the machine where I have a nice pool of intense light!
And lastly, a really REALLY good product to have on hand. You may never need it, but when you do, you WANT it immediately: iron cleaner! I a package of this stuff with my ironing supplies All.The.Time!
![]()
Speaking of cleaning your iron, be sure to take it through its cleaning process now and then so it doesn’t build up minerals around the steam holes and such. Almost ALL irons made in the last 20+ years require the use of tap water or filtered water — do NOT use distilled water in them or you ruin the lining of the water tank that lets it shed the minerals! (or something like that.) But definitely no distilled water!
I use an old picnic hamper to corral all my large ironing station needs. It sits under my ironing board and everything is at my fingertips … maybe that should say, “at my toe-tips” :) My pressing cloths lay in the bottom of the basket except for the one flour sack towel I reach for a lot — I just put it over the edge!
![]()
Get your ironing station set up with just the right tools for yourself! Ironing doesn’t have to be a (somewhat) frustrating process of running all over the place gathering what you end up needing each and every time when you find you need it. Make an ironing station with everything you need at hand, and you’ll grab that iron and do what needs to be done without hesitation!
Happy creating!
Gail


.jpg)