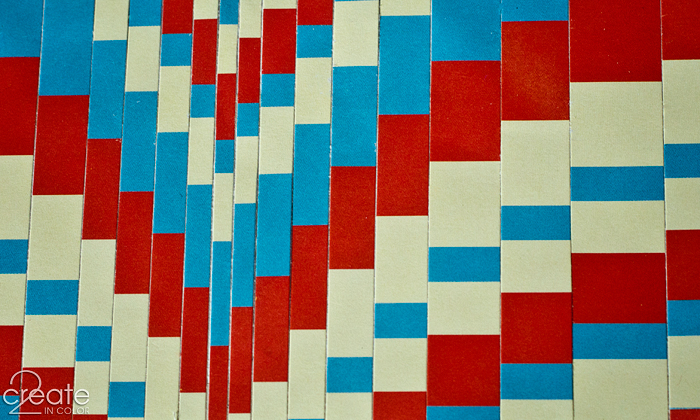
Last night, as I was preparing for my big paper-sorting session today — I’m getting organized in my new Scrap Rack system! — I became inspired by this piece of striped paper.
It was one of those moments where the finished project just suddenly *FLASH!* appears in your head. Well, that’s how it works my head anyway!
In the mid-90’s, this book showing how to make quilts that look like Bargello needlepoint was published, and Bargello Quilts became all the rage. Over the years, this idea has been expanded into some amazing quilts. (ooooh, click those last three links!)
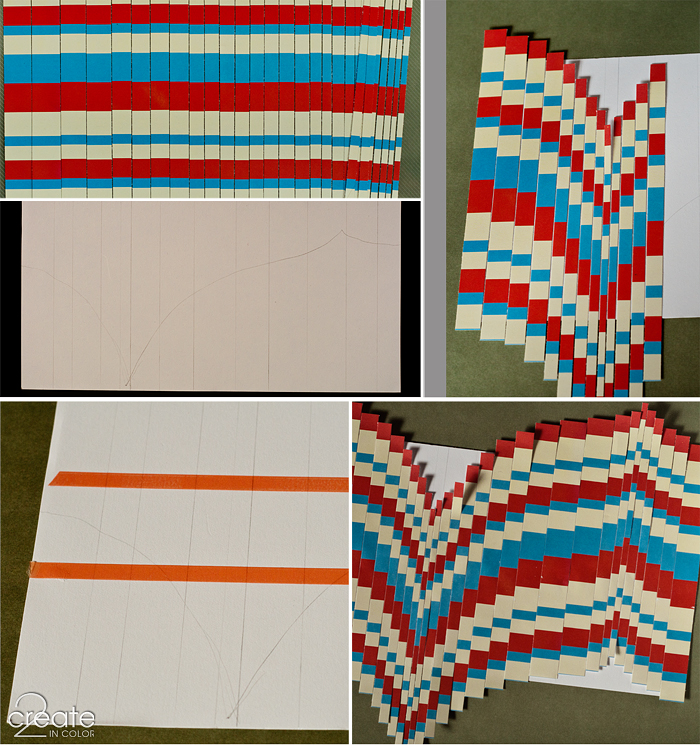
So this morning, I cut this poor unsuspecting scrap of striped paper into strips of varying sizes, sketched out a curve and some vertical guidelines, and started placing strips. My index point for the curve was right where the wide blue and wide red strips met.
That index point was what I matched up to the curve I had drawn.

I used my Terrifically Tacky (red liner) tape for one of the first times… whoo. Terrifically tacky is right, but having that liner to peel back just partway as I worked was so handy!

Once all the strips are placed down, the parts that overhang the foundation (white paper) are trimmed off, then moved to the blank area (top left image), so they are end to end with … themselves!
If you look carefully at the lower left image, you can see the curly edges of the strips (red, shadows) which are topped by the what-used-to-be bottom half of each strip (cream with tiny blue pinstripe.)
I found painters’ tape streamlined this process a lot — I was able to treat the whole overhanging set as one piece of paper. YAY!
I found painters’ tape to come in handy in a couple other steps, too. I was able to lift the whole (unadhered) set off my background while keeping their orientation and order! I just peeled them off one by one as I needed to place them back down on the sticky tape.

Also, the painters’ tape was handy for lifting up the edges and sticking down all loose ends as I was finishing.
You’ll undoubtedly notice (below) I have some circular skewing going on at the pointy parts — it’s not your imagination or my camera! Apparently, as I was cutting the skinniest strips, my paper was skooching around a bit near the end of the cuts.
And I thought I was being so careful. But sure enough, when the trimmed-off ends were placed into their new home at the other side of the foundation paper, they didn’t match up in size very well. Also, it’s really tricky to keep multiple 1/8″ wide strips going straight. Not that I’m saying I did it wrong, just that there’s somewhat of a learning curve (ha!)

Note to self: when cutting narrow strips to make Paper Bargello effects in the future, watch out! Since this was an experiment, I wasn’t very bothered by it, but I KNOW I’ll be making more of this and will want it to turn out … better. Let’s just go with better :)
This was fun, and conducting a Paper Bargello experiment certainly satisified my creative urges for the day!
Gail


.jpg)
aunty scary - Trippy. I like the skew.09.24.2013 – 4:47pm
admin - Thanks! –Gail09.24.2013 – 8:44pm