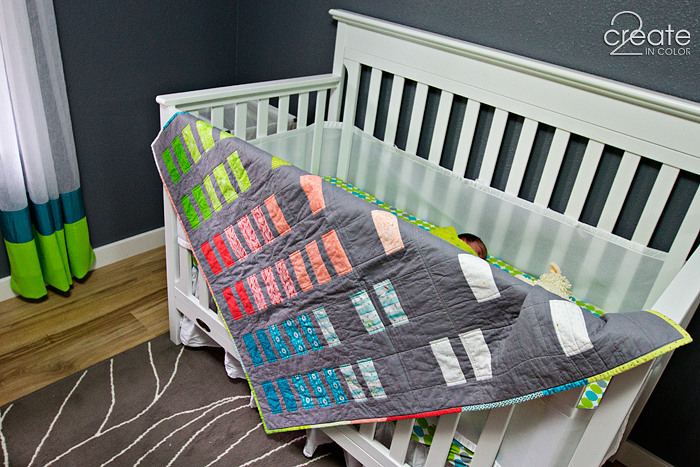
I’m sure there will be more “Skittle Quilts” along the way, and probably some for Skittle-siblings, too. But this is the first. The first grandchild, the first quilt made start to finish in one time period, the first “modern” style quilt. It was an adventure! My granddaughter had to have a quilt from me. She just did! This turned out to be more of a nursery project because it was Totally Influenced by those colors, but I tried to make the coral (the girliest) color stand out.
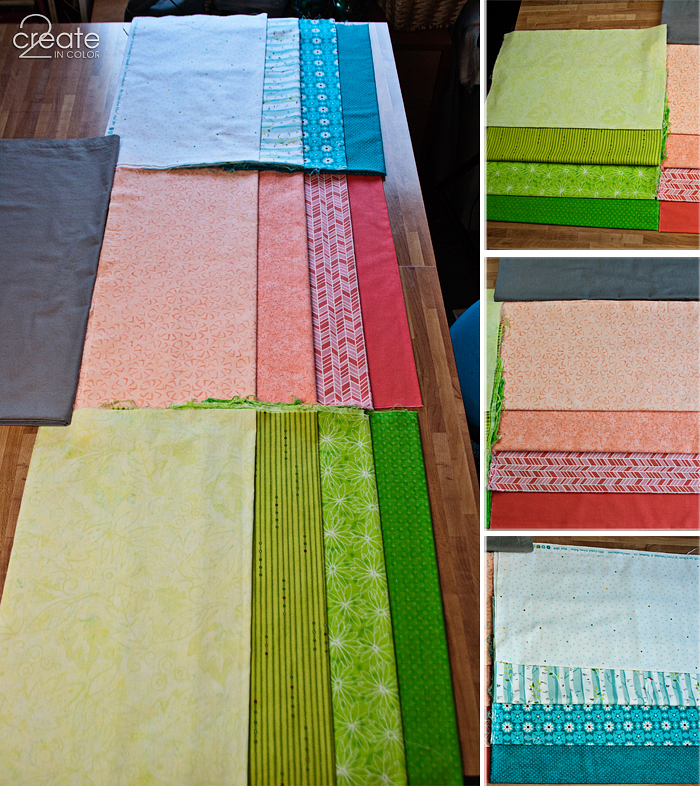
Every new project involving fabric is yet another invitation for me to go shopping :) So sad, right? NOT! I love shopping for fabric, and a real reason to go stare at the bolts, wander around in a daze, and stand for long minutes at the cutting counters of my favorite fabric stores is a treat.
Usually I am buying fabric that has firmly told me that it needs to go home with me as I walked past it, but with a project in mind I am driven to find each and every candidate that may work and evaluate it against all criteria.
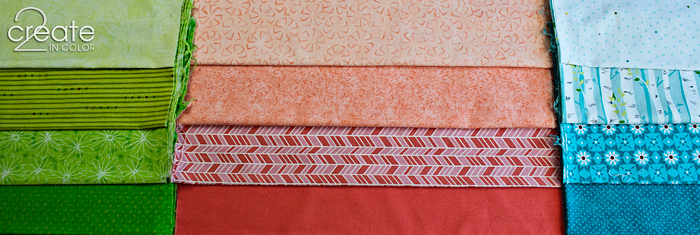
I brought home plenty of candidates. I finally decided on this collection of 4 fabrics from each of the three color groups (coral, lime, blue.) I put the coral in the middle to make it be the feature. The fact that it is a warm color while the others are cool colors also helps! (We all know green is a VERY cool color! The coolest because it is my favorite!)
While surfing the internet for “modern quilt” ideas, I came across a quilt pattern called Urban Grunge that was IT. It was THE pattern that I had been waiting to find. I am not usually a follow-a-pattern crafter/quilty-project person, but when I saw that pattern I knew it would save me from doing all the drafting myself.
So I actually purchased the Urban Grunge pattern. It was Just Right, but then I did have to make it Uniquely Mine by rearranging the spacing at the top, and adapting it for a crib-sized quilt. The pattern gave me a ready-made place to organize my changes, and that was wonderful. Happy me: MATH!

I did chart out my colored rectangle placement for the top half of the quilt. The original designer had been influenced by the equalizer display on her stereo (very cool!) I decided to go with a “dithering” effect, where each color just faded out — in shade and in quantity — as it went upward. After some cutting and pasting, I was happy. Then I labeled every color and size for all the pieces.

A random look isn’t easy to achieve!!!
By the time I got done shopping for fabric for this quilt, and also finding and adapting the pattern, my vision of it had been through some changes — minor ones, but changes — and that meant some early purchases didn’t fit any longer. Oh, no! What to do? (that’s a joke, people — too much fabric is not a problem; read my bio)
I have enough coral, blue, and lime (and some gray) fabrics to make another …. well, let’s just say I could make some more projects and leave it at that. I now have a stash of coral fabrics that I had none — that’s right: ZERO — of before.
Good thing I took on this quilt project ;) How did I ever manage with no coral fabrics in my textile collection!?
Now, I am not a big fan of repetitious sewing. I made one quilt (still not finished; it’s in the UFO pile) that had 80 blocks. E.I.G.H.T.Y. blocks. That’s when I decided I didn’t like repetitious sewing. I thought my brain would explode! How could I be playing with fabric, my favorite thing, and want to run away from it at the same time?
But when I was gathering ideas for this particular quilt I realized I was going to have to do some repetitious sewing. Quilters who have made more quilts than me (3ish) know this. Unless you’re making free-form art quilts, that’s pretty much the nature of quilts. Suck it up, Gail!

I sewed 52 gray squares onto 52 colorful rectangles, then I sewed additional gray strips onto more colorful rectangles and connected them all into 15 rows. I survived! I made a game out of keeping them organized and that kept me from succumbing to terminal fabric+boredom conflict issues. Whew.

Then I had to sew 16 gray strips in between those 15 rows. Nothing but sheer determination and the goal in sight got me through that! It was pretty exciting to see my vision coming to life!
Once I had the top done, I kind of lost momentum. It was right about the time Skittle’s due date was approaching and I was getting distracted, as usual. Doesn’t take much ;) So I let it sit for a few days. Then I realized I didn’t have the batting I needed and should go back to the store :D (Note:I actually only bought one other item and it was on 50% off. The store was closing in 15 minutes or that would be a whole different story.)

After I put a backing together (more about that in a bit) and got the layers laid out, pressed, spray basted AND pin basted — no sneaky quilt layers were going to get past me! — I had to decide how to quilt it.
That basted quilt and I had a stare-down for 3 days. THREE DAYS before it told me how it wanted to be quilted! I knew my time was running out, but one promising visit to the hospital by Sam that frustratingly didn’t evolve into the final stages of labor got me motivated to do all the finishing steps.
I was aaaaaallllllmmmmooooooost done when we got that Saturday morning phone call and my husband and I spent the day becoming grandparents! :) I feel so blessed that my daughter came through healthy and with no complications, little Abbi is perfect in every way, and Sam’s husband is so just THERE for them supporting and doing whatever needs to be done. They are a great family of three now. It’s all so very good!
Meanwhile…
… the quilt was awaiting. And I got sleepy. Don’t laugh! I did! I do this several times a year, it lasts for a few days, and I have no idea why. This sleepy phase may have been influenced by a lowering of my adrenaline levels and caffeine intake, but it is real. Long nights’ sleep and naps still leave me tired out, mentally and physically. The sleepies are almost over — yay! — but that means it took me 5 days to finish a very few hours worth of work to finish the:
— quilting (kept it simple — straight lines up/down, but they get curvy at the top where it moves onto the coral area of the backing; and going across there are straight lines grouped tightly here and there )

— and binding (had some fun using some of the other fabrics that didn’t make the “cut” ;) Pieces were stitched into one strip which I then ripped apart in a few places to make it work better with the main part of the quilt)

— then washing, drying, and steaming it for its final presentation. Which is SUPPOSED TO look like this. Just so there’s no “oh goodness, what will happen to it when I wash it for the first time/ should I wash it/ should I use it” angst. This is what will happen. Yes, it should be well used!
I had taken my mom up to see Abbi on Monday — she’s been waiting to become a great grandmother for the last few years, quite anxiously, and I really had to get her up there ASAP. It was a great visit. The next day I went back to Sam’s with my son who could have taken himself, buuuuut Ikindofwantedtogoanyway. Both days I expected to be able to take the finished quilt to her BUT I KEPT FALLING ASLEEP. I am totally NOT accustomed to being sleepy before 1 or 2 a.m., much less 11pm!

Finally it was done, done, done, so I sent it up to her on Wednesday with Abbi’s other grandma — Nona — because I just needed for it to get there already!
Then I had to wait all day to see if Sam liked it or not. Just what are tenterhooks anyway? I was waiting on them all day. Along with bated breath and fingers crossed.

Luckily, she liked it, and Abbi appears to as well. It definitely coordinates with the nursery!

Oh, and the back? That’s the flag of the Country of Skittle!

I already have the next quilt planned. Two, actually. Happy quilting!
Gail



.jpg)
Julie - Your quilt is fantastic! Thanks for walking us through how it all came together!11.29.2013 – 7:29am
Kirsten - This is such beautiful quilt – love the colours you have used!12.05.2013 – 3:20pm
admin - Thank you, Julie! I get so involved with the preparation process — one of my favorite things :) –Gail12.05.2013 – 7:59pm
admin - Thank you, Kirsten! I already loved lime and turquoise and have for a long time; Sam’s addition of the coral for the nursery really made it a fun and vibrant color scheme! –Gail12.05.2013 – 8:01pm
Thanksgiving Customer Project Round Up – Fat Quarter Shop's Jolly Jabber - […] of 2Create in Color made a modified version of our Urban Grunge […]04.24.2017 – 8:09am
Thanksgiving Customer Project Round Up - The Jolly Jabber Quilting Blog - […] of 2Create in Color made a modified version of our Urban Grunge […]06.13.2017 – 7:27am