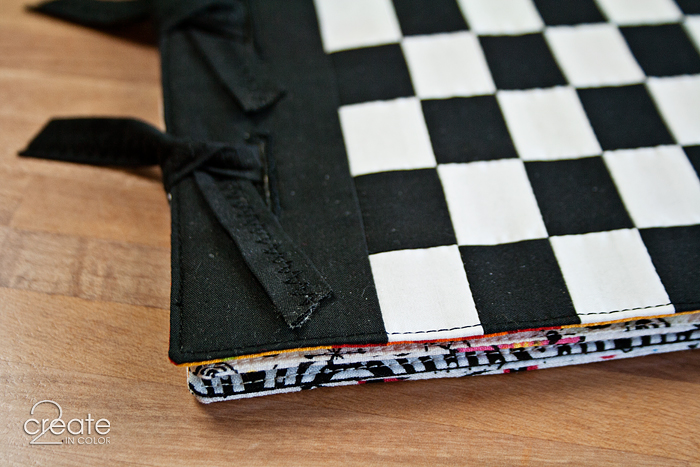
From yesterday’s newborn fabric book project, I thought I would do a basic tutorial on how to quickly piece a fabric checkerboard. This is geared mostly for a not-quite-beginner sewist, or someone who hasn’t done piecing before.
We’ll be using a technique called strip piecing. This is so useful in any 2 color patchwork! I actually have this table runner WIP that uses two similar fabrics in checkerboard fashion as part of the design.
Strip piecing is used very often in modern-day quilt piecing; it saves so much time now that we have rotary cutters that quickly and accurately cut strips!
For strip piecing, you need the trio of rotary cutting equipment for safe and accurate cutting: a rotary cutter, an acrylic rotary cutting ruler (also called a quilting ruler), and a self-healing cutting mat. You can find videos on how to safely use them on YouTube. Please take those safety concerns seriously! They are real, but easily managed as long as you understand the importance. We’re talking stitches here people, and not the kind that goes in fabric, but the kind we want to avoid from the doctor! Rotary blades are sharp, Sharp, SHARP!

The first step is to cut strips of fabric. Lay your fabric out straight, on the cutting mat, and cut the strips you need.
How do you know what size fabric strips to cut for your project? Whatever size squares you want to have showing when you are finished, all your cutting will be done 1/2″ wider.
// For instance, if you wanted to make a checkerboard pillow cover and wanted to end up 3″ squares to look at, you would cut the strips 3 1/2″ wide. //
I’m just going to keep talking in terms of black and white, but you might be doing yellow and gray, turquoise and coral… any two colors you want!

Specifically for this little book-size panel from yesterday’s project, there is a grid of 7 squares by 7 squares. They all measure 1″ square each when finished, soooo…
… I cut 1 1/2″ strips of fabric to start with. (OK, yes you might have noticed that my squares are not squares, they are rectangles… I confessed to that late night cutting mistake yesterday! I won’t be telling you any further info about that — these directions will give you a checkerboard made of squares!)
It is much easier when you are making a checkerboard with an even number of pieces: you can make one set of strips to get the whole job done. We will talk odd-numbered checkerboards in a sec, but odd-numbered ones are the only way to get all 4 corners to be the same color. Ya gotta make your choices :)
————-
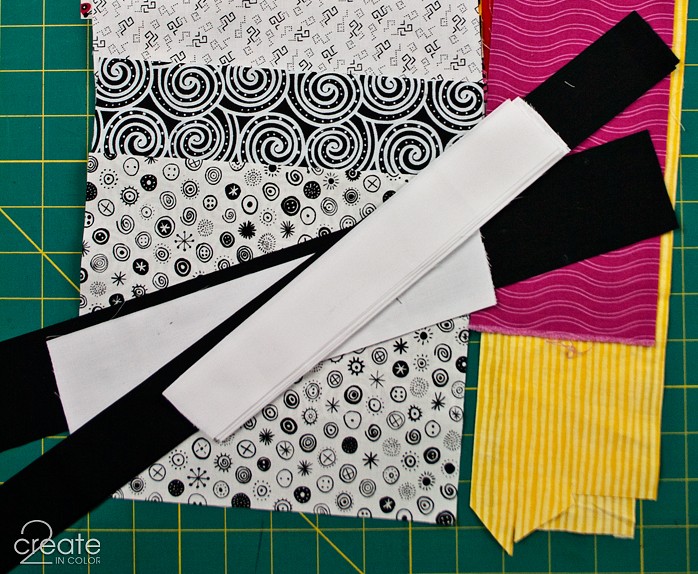
Let’s get started! Strips! Sew a black one and a white one together along a long edge, right sides together and edges matched up exactly, as we do for almost all sewing. Sew with an accurate 1/4″ seam allowance. It’s narrow! Go slowly, keep it at 1/4″.
When you get done, press the seam allowances over to the side — the side with the dark fabric. Make sure you aren’t pressing in any folds — you might not notice them from the backside, but check to make sure the fabric is flat-out before you press. I have a photo farther below that shows the backside pressed this way.
Tip: Pressing at each step of the way is E.A.S.I.E.R. than doing it later. And yes, you have to. Heat up the iron. Suck it up! ;)

Once you have all the fabric strips sewn together and pressed in pairs of black and white, sew those pairs together into groups of 4. Press the new seam allowances toward the darker fabric. Keep going, sewing larger and larger groups of strips together until you have the right number for across your checkerboard. I sewed 3 pairs of strips into a strip set of 6 to get started. Simple enough!

And the backside, with all the seam allowances pressed over, resting on top of the black strips.

———–
Odd Numbered Checkerboard info. Don’t freak out if you don’t like math! We’re only talking checkerboards here! It’s not that bad!
If you are making an odd-number checkerboard, half your crosswise strips will need to have white on both ends, and half will need to have black on both ends. OK? OK. And then there will need to be one additional strip of one of them, to make up the odd number of rows. I chose to have an extra white row so all my corners would be white.
My checkerboard is 7 squares across and 7 rows down. 4 of my rows have white on the ends, and 3 of the rows have black on the ends. I took my strip set of 6 strips and cut it into two sections…

… then I added a black strip to one part, and a white strip to the other part. Remember, you only need to do this if your checkerboard has an odd number of squares across!
Sometimes you just make two separate strip sets right from the start, especially for a checkerboard with larger squares.
Now I have strip sets of 7 strips, and exactly what I need to cut some white-on-both-ends rows, and some black-on-both-ends rows.
——————
Next, we cut the strip set into crosswise strips. How big of strips? Same as you cut the strips off the fabric! For me, that was 1 1/2″

Place the rows in order. Sew them together in sets of 2. PRESS EACH SEAM to one side OR opened up and laying flat. If you choose to press to one side, it doesn’t matter which direction now that we have alternating colors in every row — just pick one and stay consistent.

TIP! Keep track of which edge you need to sew when you pick up the two strips. It is easy to lose track between work surface and putting the fabric under the presser foot. If you sew the wrong edge together, you won’t be able to get an actual checkerboard pattern. I often use a pin as a marker: flip one strip on top of the other one, stick a pin quickly into the edges you plan to sew together, then move it over to the machine. Line it up and stitch.

The “line it up and stitch” part is pretty cool. The squares will nest themselves together because of the way the seam allowances are all pressed. Use this fact to make sure the corners of all your squares are matched up when you are finished with your sewing. You can feel with your fingertip that each seam on the top layer fits nicely against the seam on the bottom layer — no gaps, and no bulky overlaps. You can match them up and pin them, or you can snuggle them together as you come to them while sewing.
One more thing to pay attention to when you are sewing: as you sew these crosswise rows together: half of the seam allowances on the underside will be likely to get scrunched up. Just do a little peek underneath before you get too close to the next seam to sew across. If the underlayer’s seam allowances have gotten pushed out of place (from the direction you pressed them in) just straighten them out — a pin works great as a tool to do this.
—————–
Back to the beginning. How long do you need to cut the strips to start with??? Reminder: no math panic! This is a math-friendly site ;)
The original strips you cut from the fabric need to be long enough to get the project done. One multiplication problem will give you the answer you need. Remember, no math panicking allowed here!
First number: how wide are you cutting the strips?
Second number: how many rows will be in your project?
Multiply them. Use a calculator — I keep one at my sewing table. Done!
Give yourself some fudge factor (an inch or three) and that’s how long your strips need to be cut. But what if you have a shorter piece of fabric than that? Plan on making a couple of strip sets — as long as you can get all your crosswise strips cut from them, it doesn’t matter how many strip sets it takes!
My black and white strip set needed to be a total of:
1 1/2 ” (strip width) X 7 (rows) = 1.5 x 7 on my calculator = 10.5 inches long!
This does NOT include any fudge factor yet.
I had to split mine up into two parts, remember?, because I needed black-ended rows and white-ended rows. With some fudge factor included I went for 13″
That gave me 6″ to cut the 3 black-ended crosswise rows from, and 7″ to cut my 4 white-ended crosswise rows from.
More fudge factor allowance is better than less :) Save yourself some possible frustration, not some fabric. Cut longer strips!
—————–
Once you sew those last seams together, to join all the parts PRESSING AFTER EACH STEP, you have your checkerboard. Use it as a single cohesive piece of fabric in your project — TA DAAAA!
Story! I took my first quilting class in 1988 and we cut cardboard squares and triangles, used a pencil to mark the stitching lines on the fabric, and a little device to also draw the cutting lines of each and every piece, then trimmed them all out by hand. Can we say tedious??? Of course, in that class we also hand-sewed all those pieces together… was fun, but I’m on to rotary cutting and machine piecing!

Happy stitching!
Gail


.jpg)
Andrew MacLaine - Hi!
I know that you wrote this tutorial a little over a year ago, but I really want to thank you and tell you how excited and relieved I am that I ran into your site! Your writing is informative, humorous, and perfectly presented.
I have a client that I am making a VERY large “Bob’s Big Boy” outfit for, and I was planning on creating the checkered overalls in a much more difficult and time consuming manner than the way I just learned from you (I was thinking to cut each square first and then piece them together one by one… How foolish that seems now!). You saved me hours and hours of work. Thank you again!09.19.2014 – 4:09am
admin - Well, Andrew, that would have been tedious! I am very glad you found my tutorial, or any tutorial about strip piecing! Would love to see a photo of the Bob’s Big Boy costume — I’ll keep my eye peeled on the internet as I have just lost some time admiring your fantastic designs :) Thanks for the compliment and happy stitching! –Gail09.19.2014 – 9:27am
Connie L. Keen - Checker boards have 64 squares; not 49. They are 8 squares across and 8 squares up and down….05.03.2018 – 1:25pm
admin - I should have said a checked pattern. Sorry!12.28.2018 – 8:08pm
Beth - I just wanted to say thank you for posting this tutorial! I want to make a homemade Tak board and like the first commenter, I was planning on cutting each individual square and sewing it in a long and arduous process. I am new to sewing with a machine and was putting off my project until I found your tutorial and now I can’t wait! Thank you. :)04.05.2019 – 9:38pm
admin - Well yay!!!06.04.2019 – 4:24pm
Lore - Does it work on all fabrics like for example polyester?11.09.2019 – 9:32pm
admin - You can certainly use any fabric, but for a thicker fabric you will find that things end up a bit smaller. I am imagining that the polyester you refer to might be a thicker type of fabric? Either way, it works like this: Each fold of the fabric at the seam line takes up some fabric. The thicker the fabric, the more it takes up.
–Gail06.08.2020 – 11:13am
Frances - After reading comments, I want to make a checkerboard.11.07.2020 – 9:08am
Martha Santana-Guerrero - How would this be done as a quilt as you go?? And to piece them together??? I’ve yet to find a video that shows this. Please help me12.11.2021 – 10:16am
admin - I am not quite sure I understand your question. The sewing steps are described in the post’s text. I wish I could give you the exact info you need. –Gail04.17.2022 – 2:12pm