

![]()
![]()
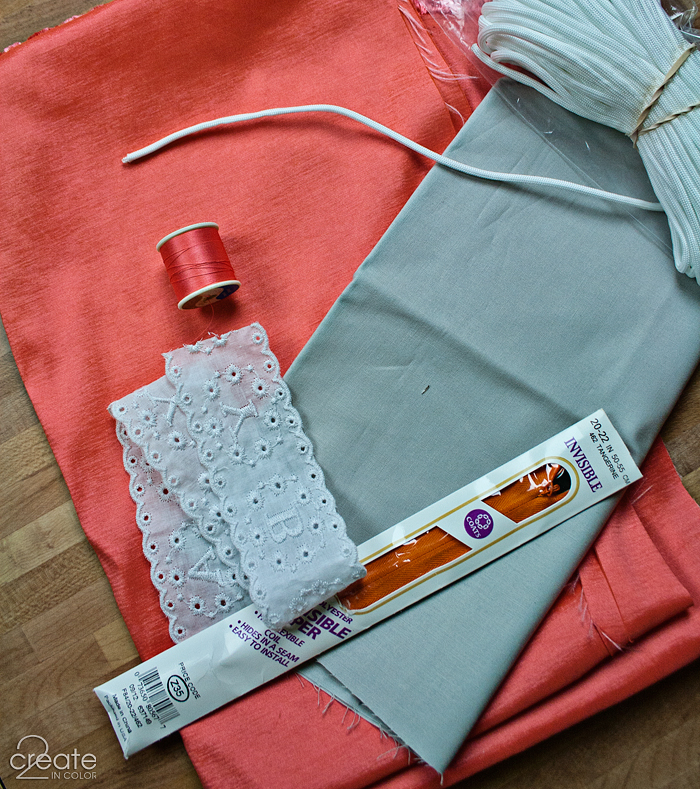
Sewing for Skittle! With less than a month before this first granddaughter’s due date, I’ve got lots of sewing to get accomplished off of my secret list! This pillow, however, was a request Sam made one day when we were buying fabric together at the same time the idea was forming in my mind.
![]()
A long rectangular pillow to put in the rocking chair. It will come in handy in many different ways. Just plain, she says. Well now, we’ll just see about that LOL I gathered a few “ingredients” and got started.
![]()
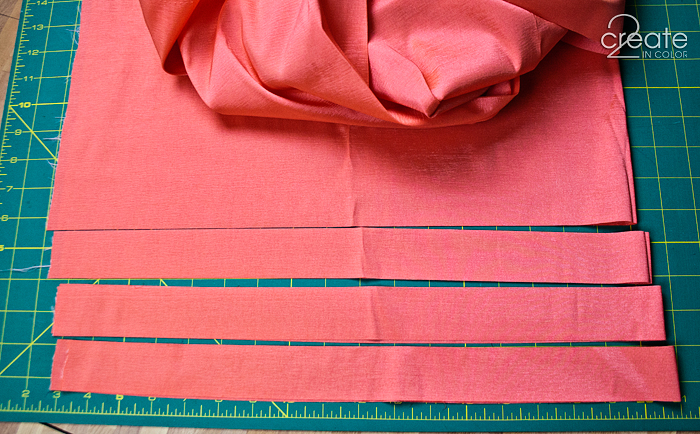
One of the things I planned to do was put a small piping, or welting as it is also known, around the edges. Doing this while also accomplishing an invisible zipper opening was going to be tricky! So I cut 1 1/2 inch strips to wrap around some cording.
![]()
![]()
When doing welting around a pillow, those sharp 90 degree angle corners are 1– difficult to apply the welting, and 2– can look kind of awkward when they are all sharp and pointy once the pillow is done. To keep the pillow corners looking less pointy, you can taper down the rectangles before you sew.
Above, each piece is pinned with all 4 corners exactly aligned.
Below, I have trimmed a wedge off the long side, and a tiny bit more off the much shorter side.
![]()
![]()
I know I say this every time, but don’t be afraid of invisible zippers. I was for decades, and still kick myself for that. I now use them almost exclusively. Here are my tricks.
Invisible zipper tip 1: Follow the package instructions. You also must have a Cording Foot or the special invisible zipper foot sold in the zipper dept.
![]()
![]()
Now, I’m putting this in a spot where both ends will be closed, so I have to mark my starting and ending points. I lined up the top and bottom pieces right sides together, just as I would sew them. You always sew everything inside out or the seams show, right?
Blogging tip 1: press wrinkly fabric before taking pictures. (sorry!)
![]()
![]()
Next I had to mark the zipper to match the opening in the pillow I have planned. I marked both ends on both sides of the zipper, then closed the zipper and made sure they matched in length!
![]()
![]()
Once I know I am putting the same length of zipper between the end marks, I can pin those ends in place.
![]()
![]()
Invisible zipper tip 2: Use Wash Away Wonder Tape as a way to baste your zipper in place. This stuff is awesome. Use a 50% coupon at you-know-where and it’s a purchase you won’t regret. (I wonder what quilters would use it for?)
![]()
![]()
Once it is basted, or taped down in this case, keep following the package instructions and sew it in. I started and ended my stitching right on my marks. Ignore the extra blobs of marker at the left end of the zipper (below) … a discarded idea.
![]()
![]()
The extra zipper was trimmed off at the bottom (above, on the left end), and the top of the zipper tapes were sewn together (above, on the right end) … it became just like a purse zipper. Then the rest of the pillow side seam was sewn up — the part before and after the zipper opening.
Invisible zipper tip 3: Thread ends: pull all thread ends to the fabric side of the zipper/fabric layer and tie them in a knot. Trim all threads that are anywhere near the zipper short enough that they can’t get into the zipper teeth EVER.
If you have been alarmed at my color choice of a tangerine zipper for coral fabric, you can now breathe easy. This is how much of it shows (below)
I am stretching it strongly apart in this picture below, too, which was pretty darn tricky with a camera in one hand and wanting to take a picture. Elbows and awkwardness were involved.
![]()
![]()
With the limited selection of invisible zippers, you just have to do the best you can. A bit darker than the fabric is better than lighter. A bit dimmer is better than brighter. The only thing you’ll end up seeing is the tab and a tiny bit of the slide. If you want, you can even take the tab off, and use a safety pin through the slide when you need to zip/unzip. Always get an invisible zipper several inches longer than you need. It is worth the extra few cents.
![]()
![]()
Made up a quick pillow form. Zigzag seams on the outside, and the opening is sewn shut after stuffing, with a longer-than-usual straight stitch because we might want to add more stuffing and it will be easier to take out. If we don’t, it’s good enough to last.![]()
![]()
Trim the corners off the inside of the pillow (like this) and press the seams open. Turn it right side out.
Here’s the pillow Sam ordered. Just plain.
![]()
![]()
Here’s the OTHER side of the pillow, with a piece of eyelet trim I couldn’t resist!!
![]()
![]()
Notice how the stuffed pillow is wonderfully rectangular! :D
Are you wondering what happened to the welting? Um, yeah. Wellllllll, I got so carried away thinking about the zipper, I had that side of the pillow all done before I realized I’d forgotten it. There was No Way I was taking any of that stitching out. Invisible zippers are easy, but let’s not press our luck!
I think it might need something more; I’m favoring a narrow gray ribbon on either side of the lace, or a couple of rows of handstitched running stitch in gray instead of ribbon. I keep seeing running stitch accents in all kinds of projects lately.
![]()
![]()
We’re gettin’ ready for ya, baby! Can’t wait to hold you!
I get to go visit Sam and rub the Skittle-belleh today :) It is pretty impressive!
Gail, gma-to-be


.jpg)
Kathy - Beautiful work!07.18.2013 – 12:13pm
admin - Thanks, Kathy! The whole nursery is coming together so well — Samantha has great vision!07.18.2013 – 8:24pm