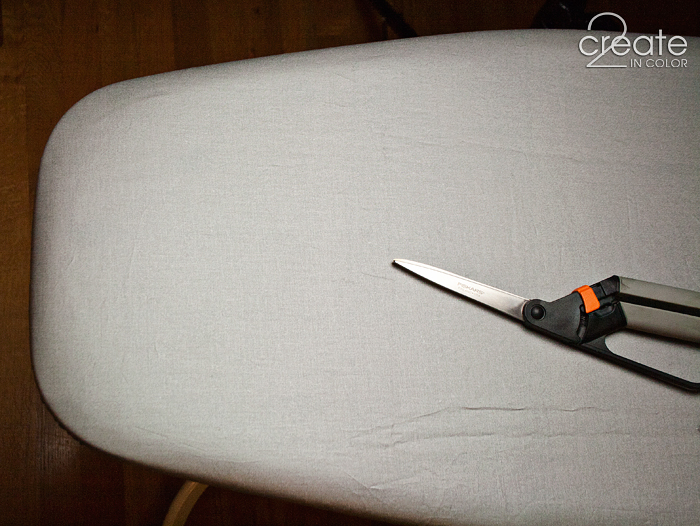
YOU could get creative with this. I will stick with my boring silver ironing board cover fabric. And isn’t it “iron”ic that this project didn’t get done last week during Sewing Week?? Let’s call it Sewing Week-and-a-half! I desperately needed to get this done!
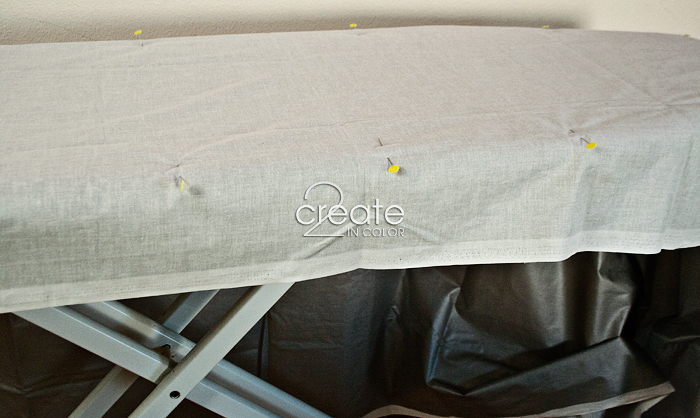
My first step: pin the fabric to the existing cover making sure there’s enough fabric draping off the edges and ends, about 3″. Then turn the whole thing upside down on the floor.
Why do I make my own ironing board covers? There are a couple reasons, and if you sew at all you might have experienced one of them. Like Sam did, when she made her skirt and napkins.
When you are pressing large pieces of fabric — yardage, tablecloth, or maybe a fantastic maxi skirt, that fabric really drags on the edges of your ironing board cover when you shift it. Sometimes that makes your cover shift right along with it, causing folds and lumps — and you might end up pressing that texture into your ironing. Or just get annoyed! Sometimes it can even slide the cover right off the corners. Ugh!
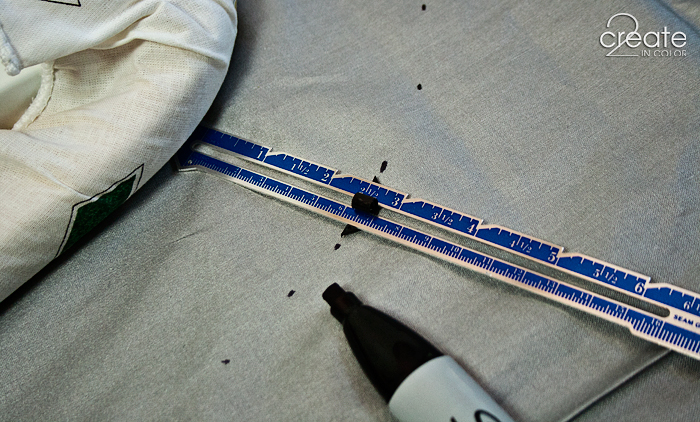
Step 2: Measure and mark 2 1/2″ away from the sides of the ironing board, right onto the cover fabric. My board is just under 1″ thick with its padding, and this gives me a cover that is going nowhere when I use it! Then turn the dots into your cutting line — I used my rulers to do the long straight sides.

The bunched up fabric at the right is because I have a non-removable hanger bar that it is catching in — that’s the reason I used my quilting rulers to draw the straight sides at the correct width.

My main reason for making these myself, in addition to the above, is my ironing board itself. I have an unusually shaped ironing board. We picked it up at Costco about… 19 years ago (sheesh!!!) because I needed one that was a) more sturdy, what with all my little munchkins at that time b) wider if possible, and c) more sturdy (see the theme here?) so I would quit knocking my iron off of it.
Don’t worry — the iron NEVER sat, heated, on the ironing board if kidlets were able to be near. Many a time I gated myself INTO the sewing/guest bedroom and watched kids play in the hallway :)

I use Wide Single Fold Bias Tape and press it in half myself. It ends up much less bulky than the Wide Double Fold (pink) — see how that one has turned-in edges that go all the way to the center fold? Mine ends up with half that; it drawstrings easier when you put the cover on!
Anyway, I knew as soon as I saw that Costco ironing board I either needed to buy a lifetime supply of covers if I could find them, or just get ready to make my own as needed. It’s a fantastic and very sturdy board even now, but sometimes its fold-out hanger bar thing really gets in the way. Like when it is time to make a new cover.

Step 3: Sew on the drawstring casing (bias tape.) Set your machine for a 2.0 width zigzag with a 3.0 length. Too short of stitch length can weaken the seam line, and the drawstring will pull hard on this! Keep your stitches near the left edge of the bias tape (by the silver fabric) and don’t go off the edge if you can help it.
It is helpful if you keep the bias tape stretched just the tiniest bit, but not so much that you interfere with the machine feeding the fabric under the needle. DON’T pull the fabric from the behind or you run a great risk of bending/breaking your needle. That’s a whole ‘nother post…

Here come the curved corners! With needle down as far as it can go (holds fabric in place without bending needle), gently pull on the bias tape so it stretches and will curve. Keep hold of it. (1 of 4)

While still gently stretching the bias tape, slide it around the fabric’s cut edge. (2 of 4)

Anchor the bias tape/fabric sandwich just an inch or two away from the needle — press firmly with your left fingers! The fabric edge should be all the way over to the folded edge of the bias tape; inside the fold, of course. (3 of4)

Slide your fingers with the fabric to the right, so you line up with the needle and stitch — CAUTION Don’t hold the fabric sandwich down so hard that the machine can’t pull it through to stitch! (note: this is not the way to put on bias tape around corners if you want it to lay flat; we don’t for this project)
Repeat this process every inch or two or three — let the curve tell you — until you’ve gone all the way around. TA DAA!
This is cover number … 6? … something like that. You’d think I would have made a master pattern by now, but I haven’t; partly because I doubt I would be able to find it when I needed it ;) One length of this *Utitlity Fabric makes two covers; I have enough to cut out 4 this time.

One package of bias tape is a little too short to do my whole cover. It’s not visible, so I just use what I have around — in this case I finished it off with that pink I showed you earlier. I like to pin the end in place since I can’t hold it. Don’t sew over pins! Leave a gap for the drawstring action; 1/4″ to 1/2″ is good.
See how the corners already have a bit of cupping going on? That’s a good thing, and results from the way I put the bias tape on — that stretching technique.
I wear ironing board covers out probably a bit faster than most people, even sewists. I am a Steam Maniac. And I sew — and we wear and use — a lot of cotton. High heat and lots of steam will wear these babies out a bit quicker, and once they start to go, they deteriorate fast.
This began at the end of the Disney Dresses project, and we’ve managed to work around it (poor hubby — I have just been using my little pressing mat LOL) (Yes, he does his own ironing!) But isn’t this old cover appalling??? Yikes! Overdue project here!

Scorched and steamed and abused, this cover had seen its last day!
I’ll take the ironing-board-cover-shaped Hole that is left in my yardage and cut out the remaining 3 layers after I adjust the back corner curve (you’ll see what I mean in a sec.) Then I’ll keep my eye out for random, clearance-priced, wide bias tape for those future covers!

Step 4: thread up a drawstring and put the cover on. What’s thin, strong, cheap, and slippery? Spool o’ Ribbon! You can use any fine cord of your choice. I also discovered that my Locker Hook (another craft) makes a perfect threading bodkin if I half-hitch the ribbon into its eye. Once you have it threaded, position the cover over your padding, then pull and tug the cord, and scooch the gathers toward the corners where they belong.
Tie in a slip knot or a bow for now — the fabric will stretch for a couple days and you’ll need to tighten it once or twice.
Note my front end (nose of the board) corners in the right picture, and my back end corners in the center picture.
The front end (on the right) looks just how I want it at this point in time. The fabric coming at an angle around that corner will stretch out just a bit, soon, and when I tighten the drawstring in a day or two, the looser-looking fabric in the corner of that picture will end up fitting perfectly! This I know from experience.
BUT, I admit to a moment of laziness that came back to haunt me. The center picture shows some baggy baggy fabric coming around the corner at the back end of my board, and that’s NOT going to go away. With my hanger-bar at that part of the board, its not going to cause me any trouble, but still… What I did — or rather didn’t — do is to measure my 2 1/2″ line around those two back corners. I eyeballed it because of what a hassle that hanger bar causes me!
You can see I left too much fabric on this cover, but I can adjust that in the remaining 3 covers I will be cutting out. I don’t need to redo it, but I would if I used those corners to ironing on! Measure, measure, measure!

Wow, those front corners are Beeeee-eautiful!
Hubby was glad to see this project underway! Its coming up on Hawaiian shirt weather, and that means every day, not just on Hawaiian Shirt Wednesday at work :)
* You can find this silver ironing board cover fabric in the Utility Fabrics section of the fabric store. Don’t be afraid to DIY a custom cover for a perfect fit on your ironing board!
Gail



.jpg)
Meg - I, too, have an old, odd-shaped board desperately in need of a new cover. Great instructions. What padding should I use. The original padding is long gone. Thanks.09.29.2015 – 5:45am
admin - Meg, I’ve heard great things about the Brabantia felt pad for ironing boards, and also a layer of wool blanket or wool felt (I’d be sure to find white or undyed felt!) However, I am still using the original foam pad — how is it still intact??? LOL — and some Warm and Natural quilt batting. I cannot remember if I have one or two layers of the W/N in there. Although it is 80% polyester, not very “natural”, I like the firmness of it right under the cover. I would NOT use Insul-Bright. However, if you can find Pellon’s Sew-in Thermolam, it is a dense polyester fleece that stays lofty after ironing; that is what I plan to use next time!09.29.2015 – 9:59am
Meg - Thanks for all the info. I did find that felt pad on amazon, and it came highly recommended. Will give it a try!09.29.2015 – 2:02pm
admin - Well then, Meg, please come back in a few weeks and let me know :) –Gail09.29.2015 – 4:05pm