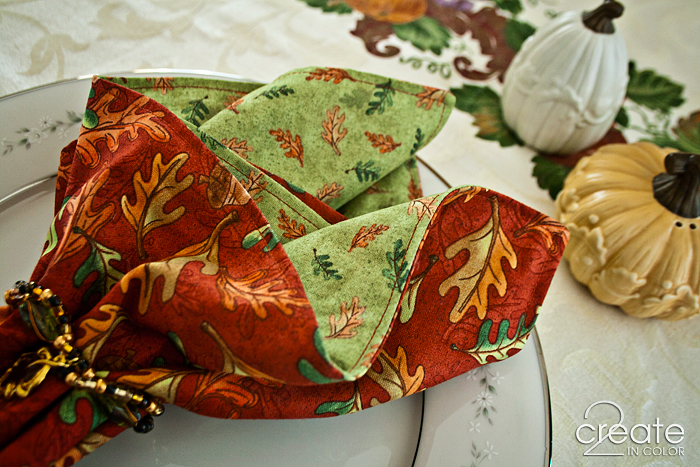
Get yourself ready! We’re going to sew reversible napkins! Plan to make bunches! I will show you EVERY step.
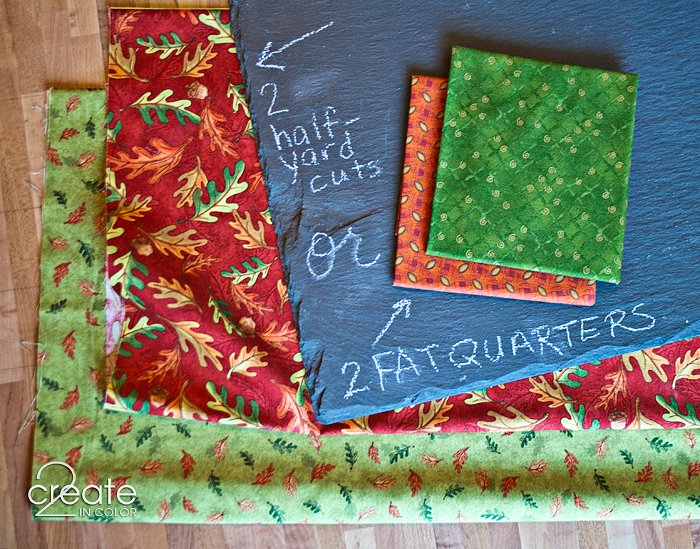
Buy the fabric.
For every 2 napkins, you need two – 1/2 yard cuts of 45″ wide cotton print fabric.
(You can use fat quarters, 2 of them for each napkin, but sometimes the fabric isn’t as nice.)

Cut the fabric.
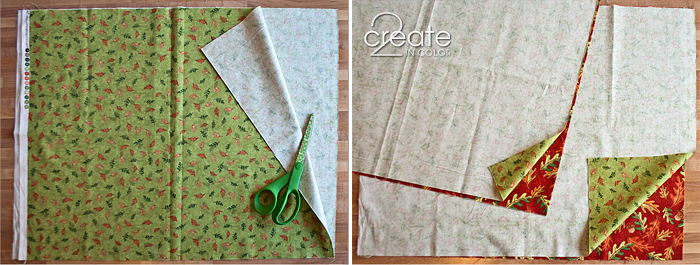
Cut along the fold of the yardage to separate it into two… well, at this point you are making them into fat quarters! Congratulations! That’s how it’s done.
Next, pick two pieces for one napkin and lay them with the pretty sides together (right sides together.) The long edges won’t match up, so work with the short ones.

Ready to cut!
Make a paper or cardboard square, or draw on the fabric, or use quilting cutting tools if you have them, but a 17″ square is your goal. Cut only as many layers at once as is EASY. I can cut four at a time.
Selvages are yucky. They shrink weird, are tough, and don’t look nice in your project. They’re like the gristle in a roast. Selvages are the gristle of the fabric world.

Get your motors running! It’s time to sew!
Set up your sewing machine with a size 80/12 needle, or a 90/14. Use all purpose thread. Set the stitch length at 10-12 stitches per inch (or about 2.4 mm). Check your tension by sewing on scraps. Find your 1/2″ seam allowance guideline.
BASTING: longer, looser stitches for temporary use. Stitch length 6 stitches per inch (4mm – 5mm.) Looser top tension. Leave long thread tails. Don’t forget to re-set for regular sewing after basting something.
BACKSTITCHING: regular sewing settings, but making your machine sew backwards for a few stitches helps keep your seam from coming undone. You only need to go backwards about 5 stitches, less than 1/2″ of backstitching. Truly. I’ve been doing it for decades this way and it works.

Press Side #1 seam allowances open. Use an iron or your fingernails (as if you were folding paper.) This is so-so-sooooo very helpful later!!
Mark the corner pivot points (optional, but super nice for non-experts!)
Mark a line 1/2″ away from the edge, both directions, so you can tell where to turn the corner when sewing. Pencil works fine; so do fabric marking pens/pencils, but wash napkins before ever ironing them if you use fabric pens/pencils.

Sew the rest of the way around.
Each corner is pictured.
CORNER #1 (left) start an inch or two back from the corner, stitching right over the top of your Side#1 stitching. You can see where the stitching looks dark and heavy — that’s where it overlaps on Side#1. Pivot and start down Side#2.
Corner #2 (right) approach it slowly! You can move your fabric a little bit to make the last stitch on Side#2 land exactly at the corner mark. Stitch Side#3 …

Corner #3 (below left) If you are more comfortable with your sewing skills, try this corner style. Stop one stitch before you should turn. Take that stitch on the diagonal. Turn the rest of the way to sew Side#4 at the 1/2″ seam allowance as usual. It will make a sharper corner when you turn it right side out. OTHERWISE do it the same way as the last one.
Corner #4 (below right) You’re coming up on Side#1 again! Almost done. Stitch this corner just like the others — once you pivot, stitch over the Side#1 stitches for an inch or two. Done!

Trimming.
Carefully cut off the corner near the stitching. Then trim a bit more each direction.
Trim all 4 corners. Then remove the basting stitches you did waaaaaay back at the beginning. If you remember which is the bobbin thread, it should pull out easy. See mine laying on the table to the left of my napkin?

Turn all four corners right side out, and bring them through the opening.
Don’t get your seam allowances all bunched up into the corner when you turn it. If you make one seam allowance fold one way, and the other seam allowance fold over the other way, you probably won’t even have to poke something into the corner to make it pop out. See it best in the middle picture. (but if you do use a tool, be gentle!)

Creasing or pressing.
Let’s do this the easy way — no burnt fingers. Use your fingernails, or a wooden pressing stick (Quilting Department tool) to crease the fabric flat at the seams all the way around. Then they’ll fold flat easier for the next step.

Close up the opening.
Remember that area? Still not stitched? Lay it flat and pin it with the edges matched up. Be grateful for those well-behaved seam allowances that turn themselves to the inside without any fuss. That’s why we pressed them open back when we were working on Side#1!
We’ll sew it closed next, in the Topstitching step.
Topstitching.
Here’s what it should look like — that stitching all around the edge. You can do this, and do it well!

Gail’s Three Rules of Topstitching.

My topstitching is a bit more than 1/8″ away from the edge. I use the side of one of the feed dog openings to guide me.
Below, I topstitched a scrap of fabric (SAMPLE) because you can’t SEE what I want you to see on my napkin!
I “started here” on the SAMPLE and was stitching toward the left. Imagine I went all the way around and was coming back to the starting point …

… and as I was finishing stitching from the right hand corner toward my “started here” spot, I kept right on sewing over the top of my first few stitches! Once I had overlapped them for about an inch, then I backstitched (about 5 stitches.)
Start and finish your topstitching like that. Follow My Three Rules of Topstitching above. You can start anywhere. Stitch all the way around plus an inch overlap, backstitch about 5 stitches.
Clip the thread tails…
AND WE’RE DONE!

Perfect for beginners. Easy for advanced beginners. Great project for all sewists. Appreciated by all.
Make them for holidays, birthdays, seasons, special color schemes, to accent your dishes… you can do it! And practice makes perfect. Or at least better :)
Gail


.jpg)
Kathy - This looks great! Thanks for the tutorial! You are so talented, I wish that you were my neighbor.11.10.2012 – 3:31pm
admin - Awww! Thanks! That would be fun. You could show me how to put bento lunches together. We could have them everyday and we could stitch together, too! :) –Gail11.10.2012 – 3:35pm