It’s that time of the year! Time to catch the last of the best produce and do what you can to save it for the winter months.
I love sundried tomatoes, whether they are in (food) style or not. Some nice sundried tomato pesto on bread smeared with goat cheese has been a favorite family snack for almost 20 years. There have been times where finding them to buy has been difficult as we moved around the country. At other times, the sundried tomatoes we were able to find were just too expensive with 3 kids who ate my sundried tomato pesto like peanut butter!
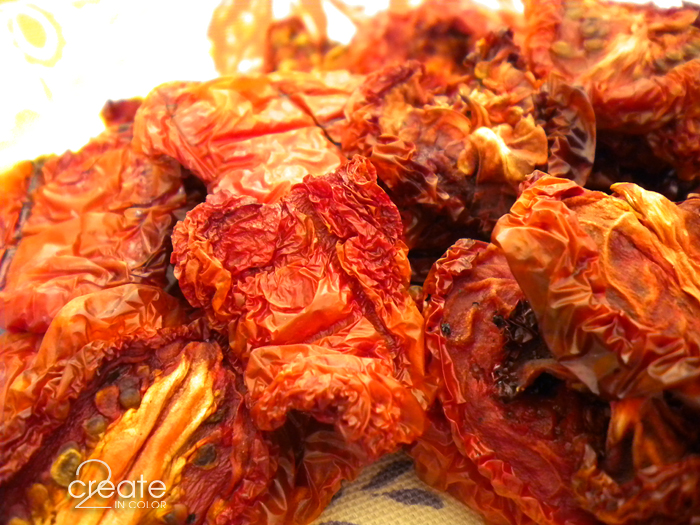
So, I learned to make my own sundried tomatoes! They aren’t actually *sun* dried, just dried. I have used my oven, an old microwave-convection oven, and now I have used an electric smoker to dry tomatoes. More about that in a bit!

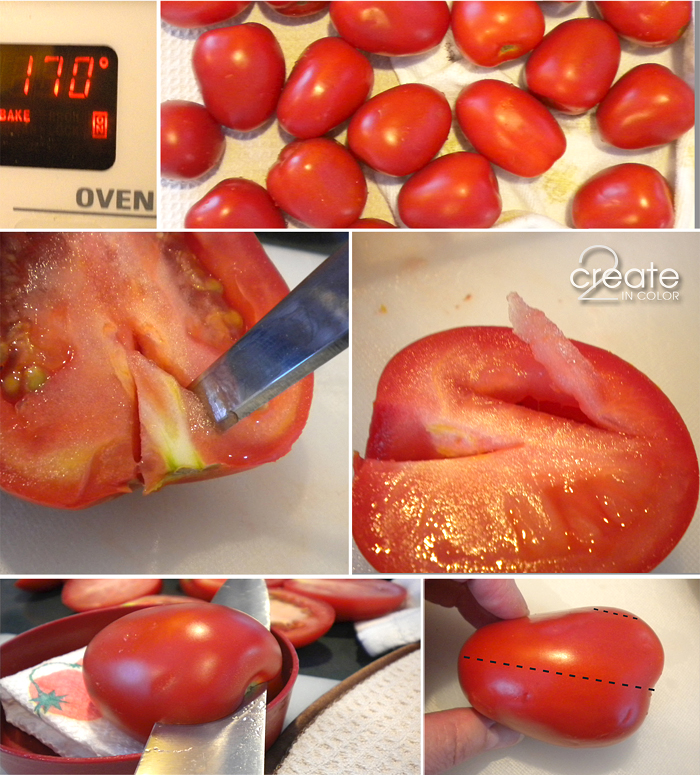
I thoroughly washed the tomatoes and then dried them off. I had some large and especially round hard-to-handle tomatoes, so I found a shallow container, folded up a paper towel unevenly to use as a shim, and used it to cut the awkward tomatoes in half evenly. Kind of like a bagel slicer… it was fun to mess with this, but not necessary – just me over-engineering things again!
If a tomato has a thinner aspect, be sure to cut it that way – the thinner the halves, the better for drying. After cutting them all in half, I removed the core with a couple quick swipes of a small sharp knife. I also opened any sealed seed cavities. On the 6 halves that were extra thick, I sliced off a little piece of skin from the underside. These are my techniques to help them dry more evenly.

No matter where you are drying your tomatoes at, it’s a good idea to keep the thinner ones separate from the thickest ones. They will dry at different speeds, and you may need to remove the thinner ones earlier. Separating them out makes it that much easier.
I started with 5 lbs. Roma tomatoes — hard to believe. I like to use Romas best because of their flavor and meatiness. They’re also large enough when dried to handle easily for julienne cuts or dicing. I’ve heard that a sweet variety of cherry tomato will make a good dried product. Maybe one day I’ll try that just to see how they taste. I netted about 2 cups of dried tomatoes, exactly as expected.

If I had to choose, I’d stick with drying tomatoes in the oven because the temperature is so much easier to maintain. Just use your lowest oven setting, preferably 150-170 degrees. It takes anywhere from 5-24 hours.
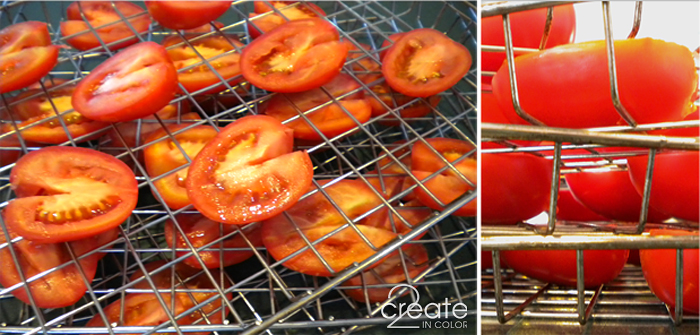
Why did I choose the smoker this time? I didn’t want to wake up to the house smelling of drying tomatoes for one thing! Also, I wanted to experiment with how the smoker works for low-temp operations. One added benefit was that my husband went to check on them most of the time, not me! :)
However, using the smoker was a terrible hassle: the temperature was erratic, and at first we didn’t have the vent open so nothing was drying at all. Also, the heating element definitely created a hot spot.
As you can see from my tiny picture just below, we had one very crispy critter! That tomato was the thickest, largest tomato so I thought it would do well back there in the bottom next to the heater. A bit TOO well, it turns out.

I never salt or pepper my tomatoes for drying any more. I like to control the salt content during the cooking stage. The only time I would find having them pre-salted/peppered is when I mince them finely by hand and serve them just like that for an antipasti offering (like when I run out of time to make the pesto, but shhhh! Don’t tell!) Any bits of peppery looking stuff on my tomatoes are just bits of char from the aforementioned crispy critter ;)
Ideally, they’d all behave like wonderfully pliant thick leather, and have no wet/squishy spots.There are definitely some of these tomatoes that are drier than others, besides the discarded crispy guy. But since I keep home-dried tomatoes in the freezer for food-safety’s sake (the wet spots can mold), I’m not too worried about it. The moisture will even out a bit as they are stored, as well.

I’m looking forward to adding these to soups, tomato sauces, and my breads this winter! I am wondering how smoky they’ll end up tasting after spending all those hours in the smoker – the smoke wasn’t on, but it’s a pretty strong smelling environment. Mmm… smoky ones might be good in eggs, yes?
If you need oil-packed sundried tomatoes, pack some loose sundried tomatoes (your own, or commercially made) into olive oil with a bit of dried Italian herb blend for a few days — no more than a week! Keep refrigerated until needed. You can also use the oil for bread, or in salad dressing.
As a bonus, I’ll share my Sundried Tomato Pesto recipe with you! Get yourself some goat cheese and rustic Italian bread and enjoy!
GAIL’S SUNDRIED TOMATO PESTO
1 c. drained, oil-packed sundried tomatoes (about 6 oz), drained
1 Tbsp. dried crumbled basil leaf or 1/4 c. fresh chopped basil
3 Tbsp. pine nuts or sliced almonds, toasted in a dry skillet*
1 Tbsp – 2 Tbsp fresh garlic, coarsely chopped
1/2 c. grated fresh Paremesan or Romano cheese
about 3/4 c. good fragrant olive oil
Combine tomatoes, basil, nuts, and garlic in food processor fitted with steel chopping blade. Process until coarsely chopped (especially the garlic). With machine running, drizzle in about 1/2 c. olive oil until it comes together into a paste; don’t use too much at this point.
Add cheese and process briefly. Add more oil, one tablespoon at a time, processing briefly to combine, until desired consistency.
We like ours thicker than salsa, thinner than peanut butter if that helps! :)

It’s very easy! I suggest you try drying your own tomatoes AND making my dried tomato pesto. The tomatoes don’t have to be pretty, just tomatoe-y!
Gail


.jpg)