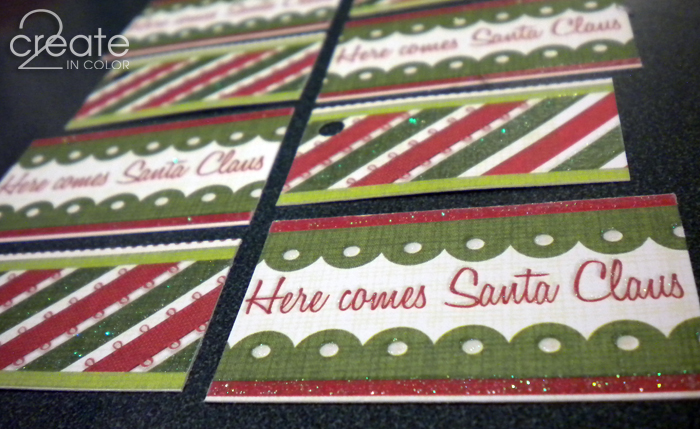
I’m here to show you how I can make 100+ gift tags out of 4 sheets of 12” x 12” patterned cardstock in under an hour. Yup, that’s right! No more worries about running out of ordinary tags for the second-string gifts.
Oh, you know what I’m talking about when I say that! “I already got her the (big item that deserves a specially handcrafted coordinating tag/card of its own), but this is so cute I have to get it for her, too!” …times 2 to 5, per kid, spouse, and important relative. And they all need tags! And suddenly you are down to those last 3 ugly tags from the package of 250 you bought 3 years ago, and that one sticker tag that’s half not-sticky…
Then there are the stocking stuffers that won’t quite stuff, and… all those other little things that just need a simple ordinary tag. A tag that you can make right now, really cheap, and have ready. Times 100. Or more.
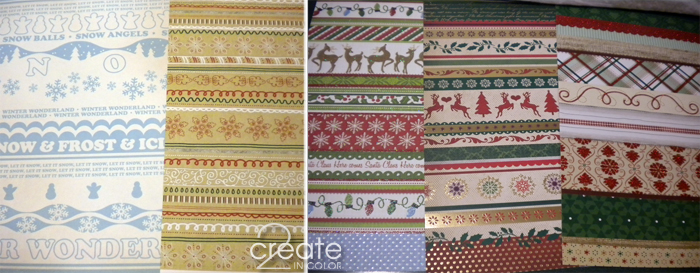
The biggest challenge is easily met long before Christmas, and that’s picking the right paper. You want cardstock, and you want interesting stripes. Border-style stripes to be exact. I’ve pictured some stripe papers below, just to demonstrate what works best. They’re not all Christmas paper, but they’ll help you see what to look for. These are the “not”s…

They are nice striped papers just above, but… pic 1: would make boring tags, pic 2: even though these would work alright, who needs a whole sheet of tags from these? 3) this is usable, but one paper is tags ready to cut (you don’t need me for that) and the light green and white papers are too random for good small tags.
Here we have workable… and great!

The photo on the left is OK — you could cut a few strips out of the white/blue paper to use, but not the whole sheet; the tan background is a nice border stripe selection but there’s not a lot to distinguish any one strip from another. On the right-hand photo, you see three papers that will make good distinctive tags from every square inch of the sheet.
Once you’ve picked out the paper, choose where to cut it into strips. There’s not always obvious choices, but see the pictures for how I cut these two sheets. I’ve got some wide strips for making squares or folded tags, and some fairly narrow strips for cutting a basic rectangle. I like to make a couple round tags, too. I use a 2” circle punch, so the strips for that need to be either 2 ¼” (ish) wide or 4 ¼” (ish) wide – you’ll see how it works below.

I made some hole reinforcements out of coordinating adhesive cardstock, for tags I make with holes and a string loop. These are great if your cardstock is lighter weight, you have a lot of pre-Christmas snooping, or it gets wild and crazy on Christmas morning! I like to take the backing paper off while the reinforcements are still just a strip of holey paper, then stick it down to a larger sized piece of waxed paper (or backing from stickers you’ve used up.) THEN I cut individual pieces off, waxed paper and all, as needed. Taking the reinforcement off the larger piece of waxed paper is so much easier than trying to peel the backing off a tiny square!
Cut most strips into rectangles to “please the paper” – most of the time the printed pattern has places it makes sense to cut. Sometimes you’ll need to discard the ends because they have half a reindeer hanging onto the edge or something. I use a minimum of 1” x 2” tag size, a maximum of 3” square – we’re going for quantity, here!
The one fancier tag I make from these strips requires a large circle punch – 2” is good. You will fold the paper strip. Be sure to score the paper along the folding line first for best results! Fold the 4”(ish) wide strip in half, and place it fold-first into the punch. DON’T PUSH THE FOLD ALL THE WAY BACK! You want to make sure that about 1” of the fold won’t be cut by the punch. There’s a picture just below that shows you how it works. Add a hole and a hanging loop and you’re all set: big enough to write a little sentiment inside.

If you can write on the front of the tag – keep white AND black markers handy! – attach it to the gift with tape circles or just tape straight across the whole tag and onto the gift. That’s what Scotch Magic Tape is for, ya know? Otherwise, write on the back. You can use a to/from stamp if you wish! Tape just the top edge, or…
For some tags, I punch holes in one corner, thread a 6” – 8” piece of curling ribbon, yarn, twine, or embroidery floss through it, and tie an overhand knot. This is long enough that you can hook it through a loop of a gift bow or around the gift’s ribbon. I don’t usually do this ahead of time, though.
These may not look so impressive, but they can be a lifesaver! Unless it is a large tag or card that’s marking the gift, most of us will be happy with the holiday themed, slightly coordinating look that Christmas scrapbook paper can offer us — that, and that the tag has our name on it ;)
70 tags from two sheets of paper tonight! I did make more small ones than other times. It is very easy to get 25/sheet. All those new Christmas design papers are just waiting for you… now is THE time to get this done!
Gail


.jpg)
Kathy - Thanks for the great idea! It seems like it is never too early to think about creating cute gift packages.08.08.2012 – 7:08am